There are many privileges which come with the popular cloud environment, i.e., Office 365. One is the facility of shared mailboxes. An Office 365 administrator can create a shared mailbox anytime with Office 365 interface and assign the desired members to it with full permissions to access that mailbox data (share or receive data). For sharing meeting details and other event information, the shared mailbox includes calendar feature as well. The most important aspect of the shared mailbox in Office 365 is that the administrator requires no license for it if it holds the data up to 50 GB. However, for storing more than 50 GB data, a license needs to be purchased.
Office 365 allows converting the regular mailbox to the shared mailbox and shared mailbox back to the regular user mailbox. But why one wants this conversion? Let us understand through some scenario.
Scenario 1: When the organization needs to share that particular set of information from the user mailbox to multiple users and requires working on a same project as a team with the help of that data.
Scenario 2: When some ex-employee has left the organization and his user mailbox with a license needs a data backup. Now to release the license and also for data reference, conversion can be followed.
Scenario 3: When a manual migration method such as cut-over or staged migration is performed while migrating to Office 365, the shared mailboxes get migrated as the user mailboxes. These mailboxes will work for 30 days only without license only. To avoid this cost of license, one can convert user mailbox to shared mailbox.
All the scenarios point to the need of conversion from Office 365 user mailbox to shared mailbox. In the next section, we will learn how to convert a user mailbox to shared one.
IMPORTANT: One important thing to note before moving ahead to the process of conversion is that the user mailbox must have assigned a license and reset the password before converting to the shared mailbox. Otherwise, conversion option will not be visible. And do not delete the user mailbox after the conversion as the shared mailbox would require it as an anchor to work. If you want to store more than 50GB data in your shared mailbox, then a license needs to be assigned to it. Also, there would be no modifications in the set rules once the mailbox is converted to the shared mailbox.
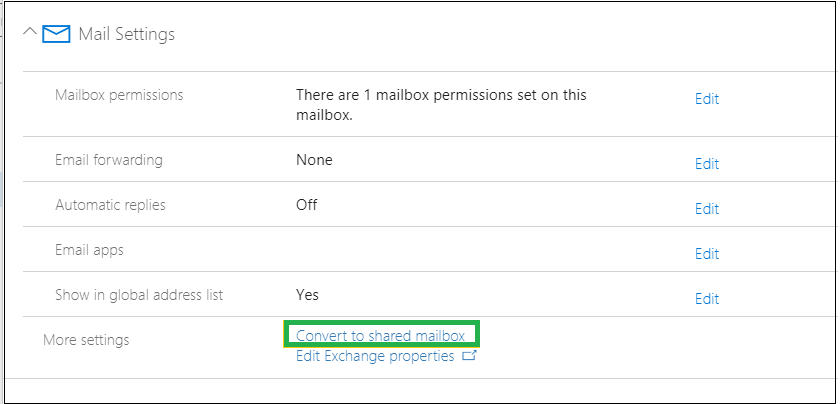
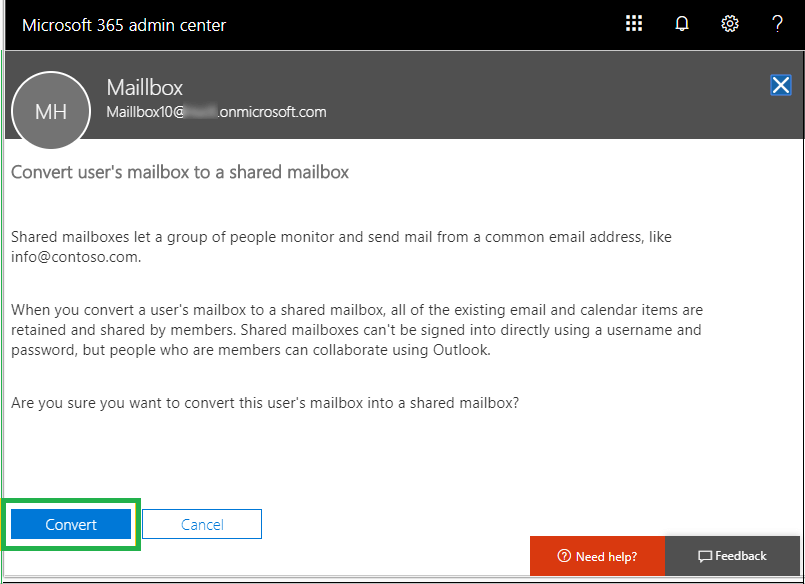
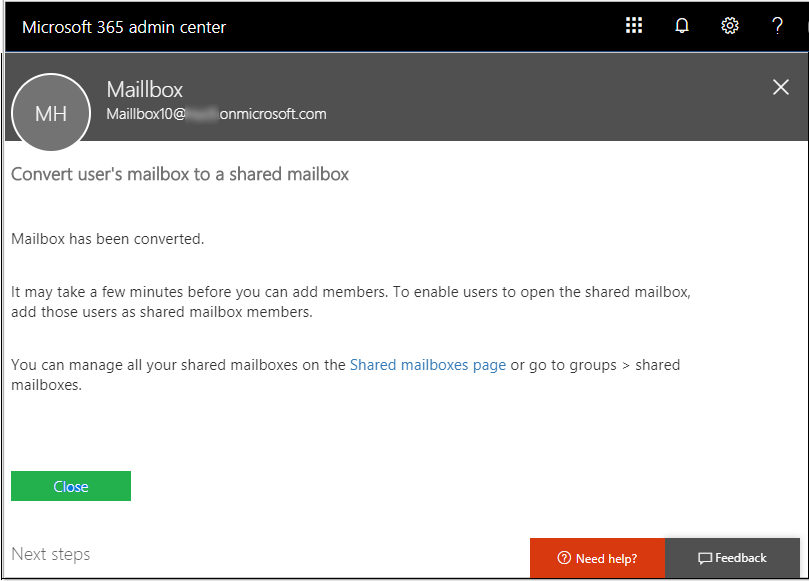
To convert a regular mailbox (with assigned license) in Office 365 to a shared mailbox, perform the following necessary steps.
Note: If the user mailbox is smaller than 50GB, request for lowering license count for billing after removing the license. Also, it is suggested to block sign in for shared mailbox for its security.
It requires connecting to the Exchange Online PowerShell with the global administrator credentials and assignment of Recipient Management or Organization Management Role groups to the administrator to use the conversion command for the regular user mailbox to the shared mailbox in Office 365.
First, connect with the Exchange Online PowerShell command using the following sequence of commands in the Windows PowerShell run as administrator.
$UserCredential = Get-Credential
A dialogue box will appear. Add your Office 365 accounts login credentials and click OK.
Next, run this command to start the session.
$Session = New-PSSession -ConfigurationName Microsoft.Exchange -ConnectionUri https://outlook.office365.com/powershell-liveid/ -Credential $UserCredential -Authentication Basic -AllowRedirection
The final command to run is
Import-PSSession $Session -DisableNameChecking
Now you are connected to the Exchange Online PowerShell, you can run the following conversion commands.
Set-Mailbox -Identity <user mailbox name@domainname> -Type:Shared
Here, provide the email address of the regular user mailbox for conversion.
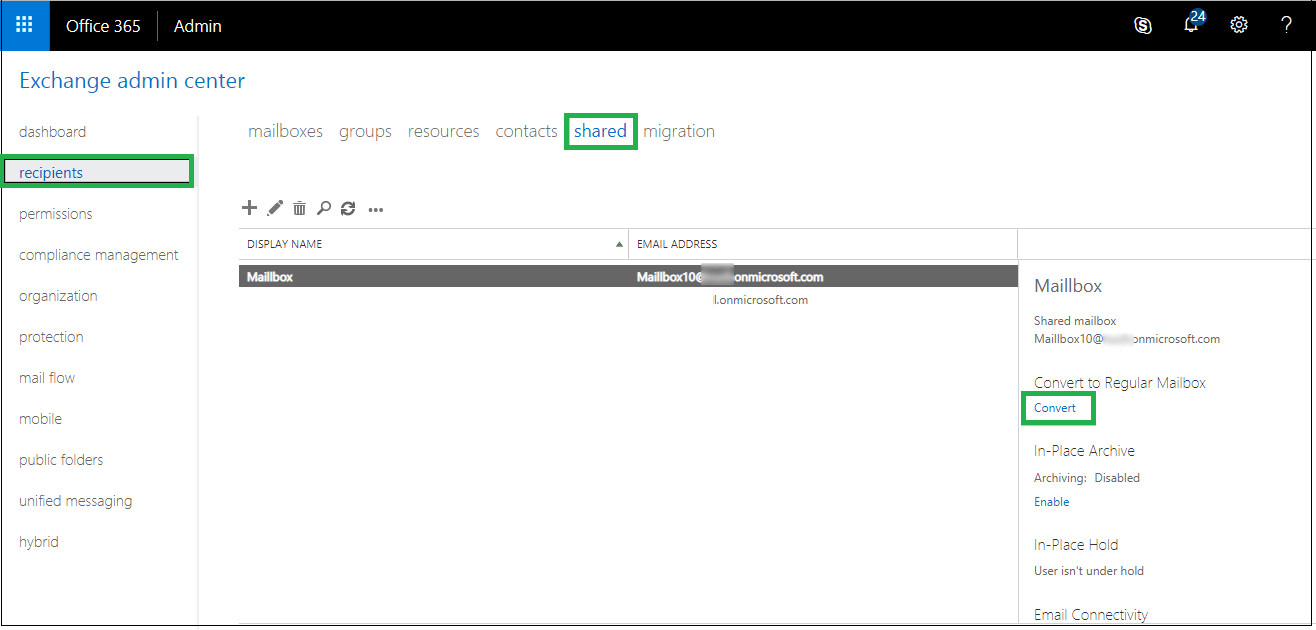
Similarly, the command for converting the shared mailbox back to the user mailbox is as under.
Set-Mailbox -Identity <user mailbox name@domainname> -Type:Regular
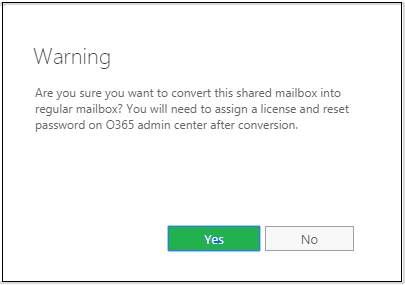
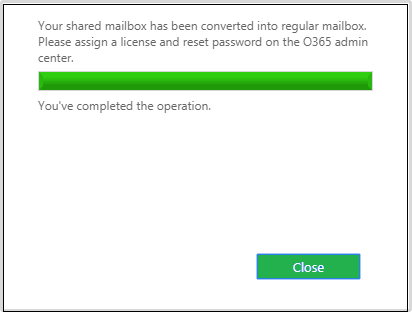
Sometimes, the situation gets reversed, i.e., need for the conversion of a shared mailbox to user mailbox arises. It is too feasible through the in-built Office 365 features. Let us see how.

So, the users have learnt how to convert a user mailbox to shared mailbox and a shared mailbox to user mailbox in Office 365. This manual method for conversion of mailboxes in Office 365 is easy to execute and feasible. You can try yourself once for the confirmation.
For users, who require backup their Office 365 data including shared mailboxes data to a secure place to avoid situations like online frauds, data breaches, hacking, etc., can follow the most reliable tool, Office 365 to PST software. It readily backup the required data from all mailboxes in Office 365 to PST format at the system location. User can anytime access this PST file in their Outlook application. The tool has outstanding interface with easy-to-understand features and icons. Users can visit the software website to clear their views more on this exclusive tool and download the free trial version.
Conversion from regular mailbox to shared one and shared mailbox to regular mailbox in Office 365 is well displayed with in-built Office 365 features. Importance of license is also considered while converting the mailboxes. Office 365 data security concern is fulfilled with the advanced 3rd party Office 365 backup tool which secures cloud data to portable Outlook PST file format flexibly.