Gmail to Office 365 migration can be considered by any single user or by the complete organization. It may be owing to the relocation of enterprise or Office cloud features and stability. The migration of data from one location to another is completely user’s choice and requirements. Moving from web-based email client application to cloud application can be accomplished either through manual ways or through professional third-party software. Since the users tend to try manual solution more, for their satisfaction, we have provided the procedure which they can try themselves.
This manual migration procedure is divided into steps and needs to be followed sequentially one after another. Perform the process of migration of Gmail to Office 365 as follows:
Here, the user needs to verify first to Office 365 that they own the Domain used in Gmail account. Perform the steps.
In this step, user need to add users to Office 365 and after deciding how many users are required to be created, purchase licenses for them before creating in Office 365. Go to Admin-center>Billing>Subscription>Add/Remove License. Then select the number of licenses for purchase which can be monthly subscription or annual subscription.
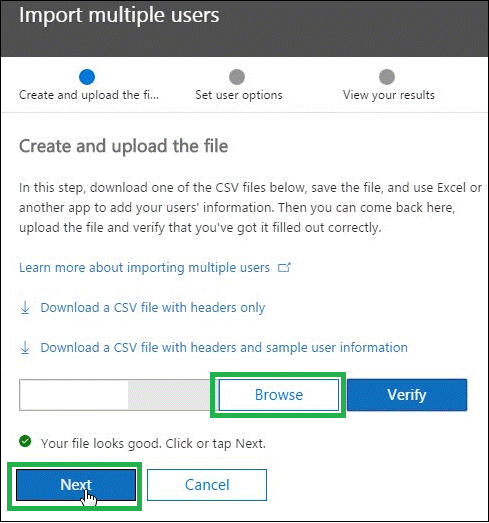
Now add the users to Office 365 by navigating to Admin Center>Users>Active Users>More>Import Multiple Users. Here, by selecting the option Download a CSV file with headers and sample user information, you can download a sample file and create a CSV file for adding multiple users. That CSV file contain the details based on the header row -) User Name 2) First Name 3) Last Name 4) Display Name 5) Job Title 6) Department 7) Office Number 8) Office Phone 9) Mobile Phone 10) Fax 11) Address 12) City 13) State or Province 14) ZIP or Postal Code 15) Country or Region and rest the users details in the next rows.
After creating the CSV file, click on Browse, select the file and add it. You can verify the format by clicking on Verify tab. After the validation of format, click on Next.
The users will be added. Now, assign the product licenses purchased earlier to each one of the added user.
Users should have list of email addresses of all the mailboxes along with passwords beforehand in Excel sheet. For email addresses information, user can sign in to Office 365 and go to Users>Active Users and copy all the created users’ email address.
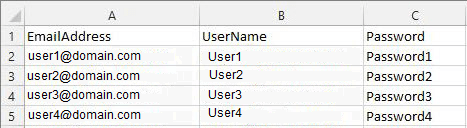
Now create a CSV file adding user’s details under the header row – 1. Email Address, 2. User name, 3. Password, where 1. Email Address is the email address of the Office 365 mailbox, 2. User name is the sign-in name of Gmail’s mailbox, 3. Password is the password for the Gmail mailbox’s user.
Connection can be made between Office 365 and Gmail is through migration end-points (technical term for settings required for building connections for migration). To create migration endpoints required for connection between two applications, perform the steps:
Moving ahead in the manual migration process from Gmail to Office 365, a migration batch needs to be created. Create the migration batch with the given steps:
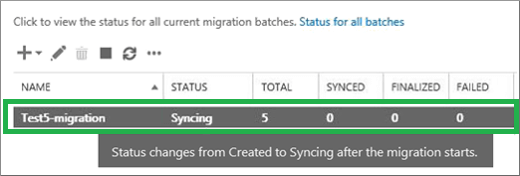
So, the migration of Gmail mailboxes to Office has started and will take some time to complete. Users can check the status of migration by visiting Exchange Admin Center and navigating to Recipients>Migration and checking if the status has updated to Syncd.
The task is not over yet. To ensure a successful migration, each migrated users should follow the steps:
The manual migration process that we just discussed can be performed but healthy only if the user or organization has sufficient time. Also, chances of errors are also there with such a long process. Technical knowledge is a requirement here. For busy users and urgent scenarios, taking help from a professional third-party tool like IMAP to Office 365 migration tool is recommended. The advanced software is affordable and comes with intelligent filter options. So, if you are looking for an error-free reliable migration, consider this tool freely.