In Office 365 subscription, the base account is the Administrator that can create further administrator and user account. A normal user account is called a tenant that gets all control, settings, and rights from an Administrator.
An employee of the organization who gets the correct tenant management can help in greater productivity, collaboration, performance, creativity, security, and compliance.
What is an Office 365 tenant?
An Office 365 tenant is the single instance of all cloud services and the organization’s data stored in a default location. The location is selected when the Administrator creates the tenant account. Each tenant is different from another tenant due to its unique location, properties, and distinctiveness.
How to location tenant location?
The default location of the tenant is established while creating the account. The Administrator can check out the location in Office 365 Admin Center or by running some cmdlets in Exchange Online PowerShell.
Checking location using Office 365 Admin Center
- Use Office 365 Administrator credentials to enter into Admin Center. Then, click Settings. Choose Organization Profile.
- Click the Data Location option on the Organization Profile page and it will display the selected Region of your selected tenant.
Checking location using Exchange Online PowerShell
- Start Windows PowerShell as the Administrator.
- First, you need to connect PowerShell with an Exchange Online account. Type the command –
Set-ExecutionPolicy RemoteSigned
It will ask if you want to really change the policy, then click Y and Enter.
- Run the next command –
$UserCredential = Get-Credential
It will ask you to input the credentials of your Office 365 account. Input them click OK.
- Create the session with the following command –
$Session = New-PSSession -ConfigurationName Microsoft.Exchange -ConnectionUri https://outlook.office365.com/powershell-liveid/ -Credential $UserCredential -Authentication Basic –AllowRedirection
- Import the session using the next command –
Import-PSSession $Session
- After creating the session, you can get the location of the tenant using the special cmdlet –
Get-OrganizationalUnit
The command will show a detailed overview of all information about the account. There is an OrgnizationID parameter that shows the location of your account.
How to change the tenant location?
Some eligible Office 365 subscribers can request a complete migration of their organization’s data to a new data center. This moving program accepts requests from eligible users. The customer can see a page in their Admin Center to create a move request for their core data to a newer datacenter region.
- In Admin Center, click Settings, then choose Org Settings.
- Go to the tab Organization profile and open Data Residency.
Note: If you cannot see the Data Residency page, then it shows that your account is not eligible for tenant movement. - The following image shows an example of the data residency page for a tenant account.
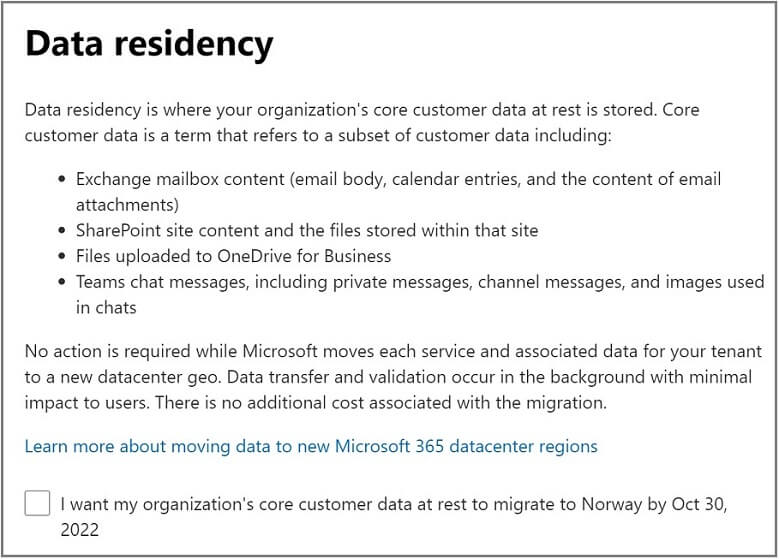
The program will move a subset of the overall account-
- User Mailbox content (email, calendar, attachments)
- Complete SharePoint Site collection and files stores on the site
- Cloud files saved in OneDrive for Business
- Microsoft Teams chats (private chats), channel messages, and images used in chat.
- Click the checkbox that confirms that you want to move your organization’s core customer data to the available data center.
You will get a confirmation message that your request has been recorded successfully.
After getting your request, Microsoft will weigh the constraints of the operation and move them accordingly. Although it does not provide any fixed date about the total location change, the customer gets a constant notification in the Message center after each service is moved completely.
Note: The movement may take up to 24 months to complete for a larger organization.
Conclusion
The availability of data residency is limited to some regions only. If you do not see such a page in your Admin Center, then you cannot manually move the data. However, you have another option to use a professional migration software that will move the entire mailbox between two or more tenants. First, you should create a tenant in a new region, then use the professional Office 365 migration software to move the mailbox into it from an older account.
It is a far beneficial and simple method rather than being dependent on the availability from Office 365. The software can migrate unlimited mailboxes and provide other suitable features to maintain a large migration in the minimum time.