When you are using Outlook professionally with multiple accounts, then there will be a great number of emails coming in and going out from these accounts. When you send emails from your account, then you can find them in the sent items folders. When the number of emails in the Sent Items increase beyond your capacity to easily manage them, you need to move Outlook sent emails to a specific folder.
Outlook has multiple features that you can use to accommodate the emails separately from the default folders. The first method is to establish a rule regarding the sending emails or choose any specific folder while sending an email.
Create a Rule in Outlook
A Rule in the Outlook is commanded action that a user applies to the incoming and outgoing messages. A rule satisfies a given condition and the user can create multiple rules for the account. Here is the process;
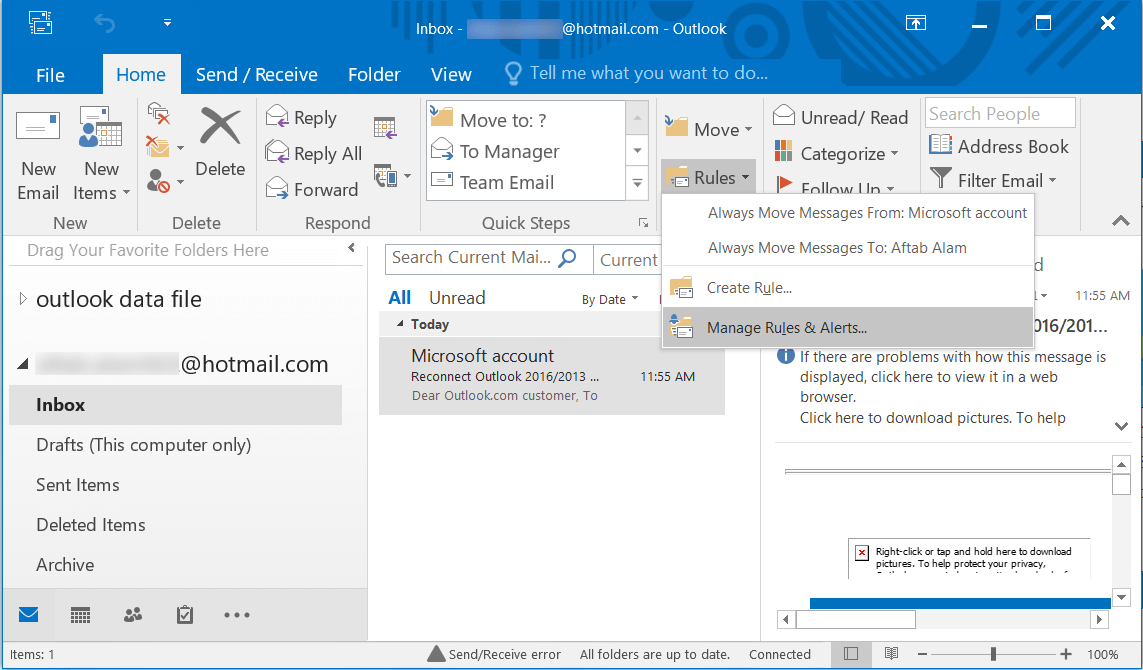
- Start Outlook from the Applications menu. After opening the Outlook, go to the account whose sent items you want to move to a different folder. In the Home Tab, you will see Rule option below the Move feature. Click it and Choose Manage Rules & Alerts.
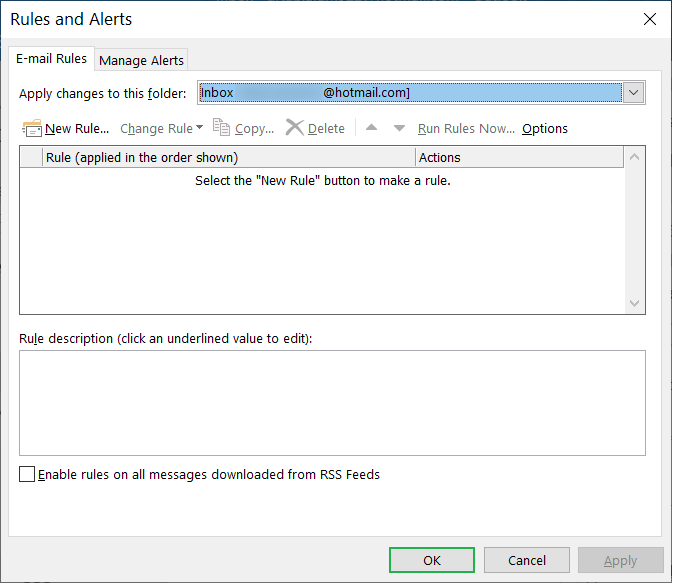
- In the Rules and Alerts wizard, you can see that there is no existing rule right now. You need to click New Rule option.
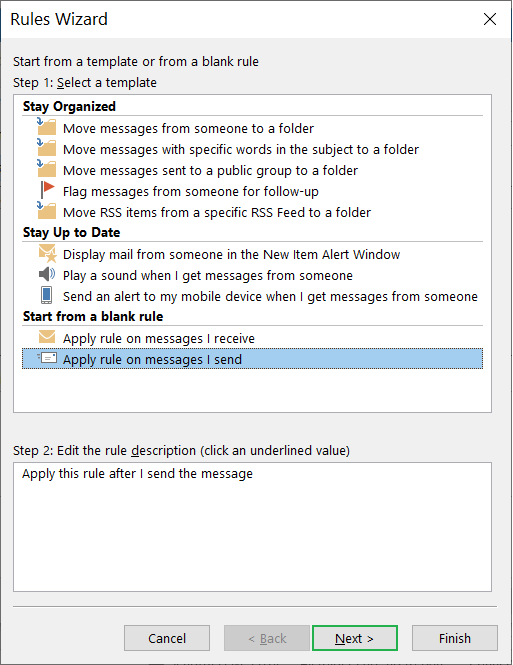
- Select the last option, apply rule on messaged I send. Then click Next.
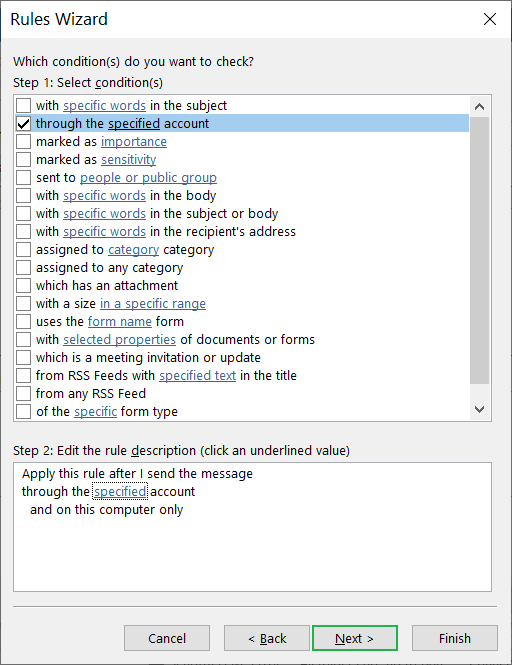
- Click the checkbox – through the specified account. To create a new rule, you need to mention the account and you can choose it by clicking the ‘Specified’ link in the below section.
- From the drop-down, choose the desired account and click OK.
- After choosing the account, click Next.
- In the Rule Wizard page, click the option ‘move to a copy to a specified folder.’ Click Next.
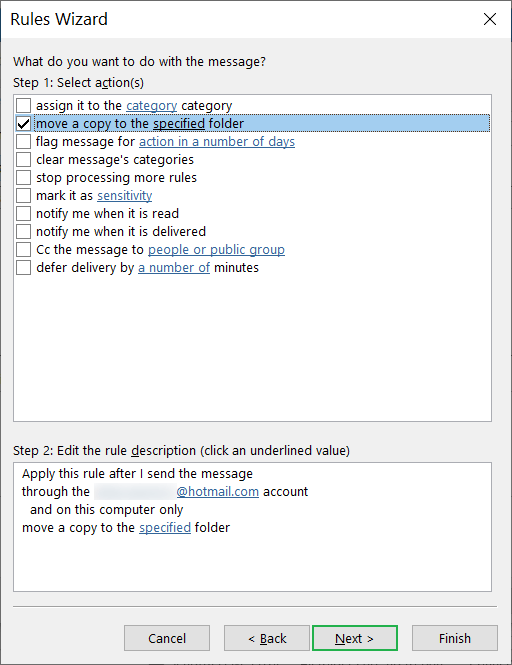
- All the folders of the account will come up. You can use an existing an folder or click the New button to create a new folder.
- Provide a name to the new folder.
Click Ok. - Choose the newly created item and click OK.
- The Rule description will provide you the information about the selected account and folder. Click Next.
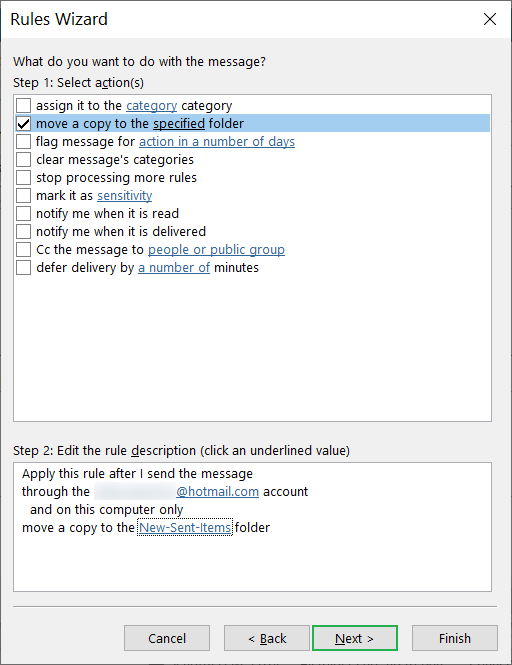
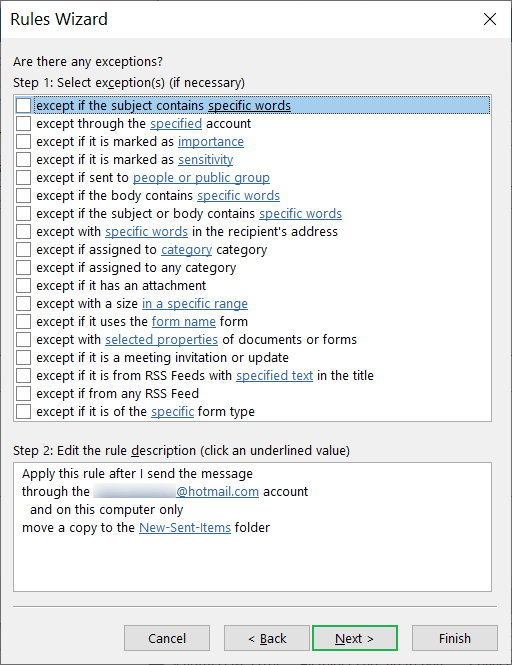
- In the new page, there are multiple exception options that you can select for some message or you can just click Next button.
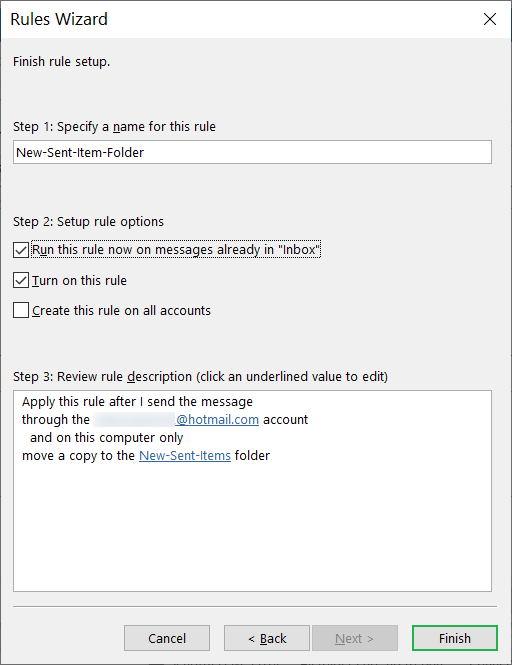
- Specify a new name to the Rule. Also, click the checkbox to Run this rule now on messaged already in Inbox. Click the other checkbox to turn on this rule. Click the Finish button.
- You can see the new Rule in the Rules and Alerts page.
Click Apply and a new rule is created which will move Outlook sent emails to a specific folder automatically.
Disable the function- “Save Copies of Messages”
When you don’t need save copies of messages in the Sent Items folder due to less space availability or any other reason you can disable the function. Even after creating a new rule, a copy of sent emails will be saved in the Sent Items folder which again takes up the space there, but you can clear it yourself by disabling the option. So, you will have to disable the Save Copies of messages in the Sent Items folder. Steps are as following-
- First of all go to the File tab and click Options.
- After that select the Mail tab and uncheck Save copies of messages in the Sent Items folder, and then click on OK.
Note: After disabling Save Copies of Messages, the copy of sent items will not be saved in the Sent Items folder anymore.

Recommended: Top Methods to Fix Missing Sent Items in Outlook
Save Sent Items to different folder
As we have mentioned earlier that Outlook offers all the feature to amplify the email communication. So, you can apply a different method to move Outlook sent emails to a specific folder. You do not need to create a new Rule to move the sent items. When you are sending an email, then you can instantly mention a different location for the sent items. Follow the process;
- Start Outlook and click New Email option.
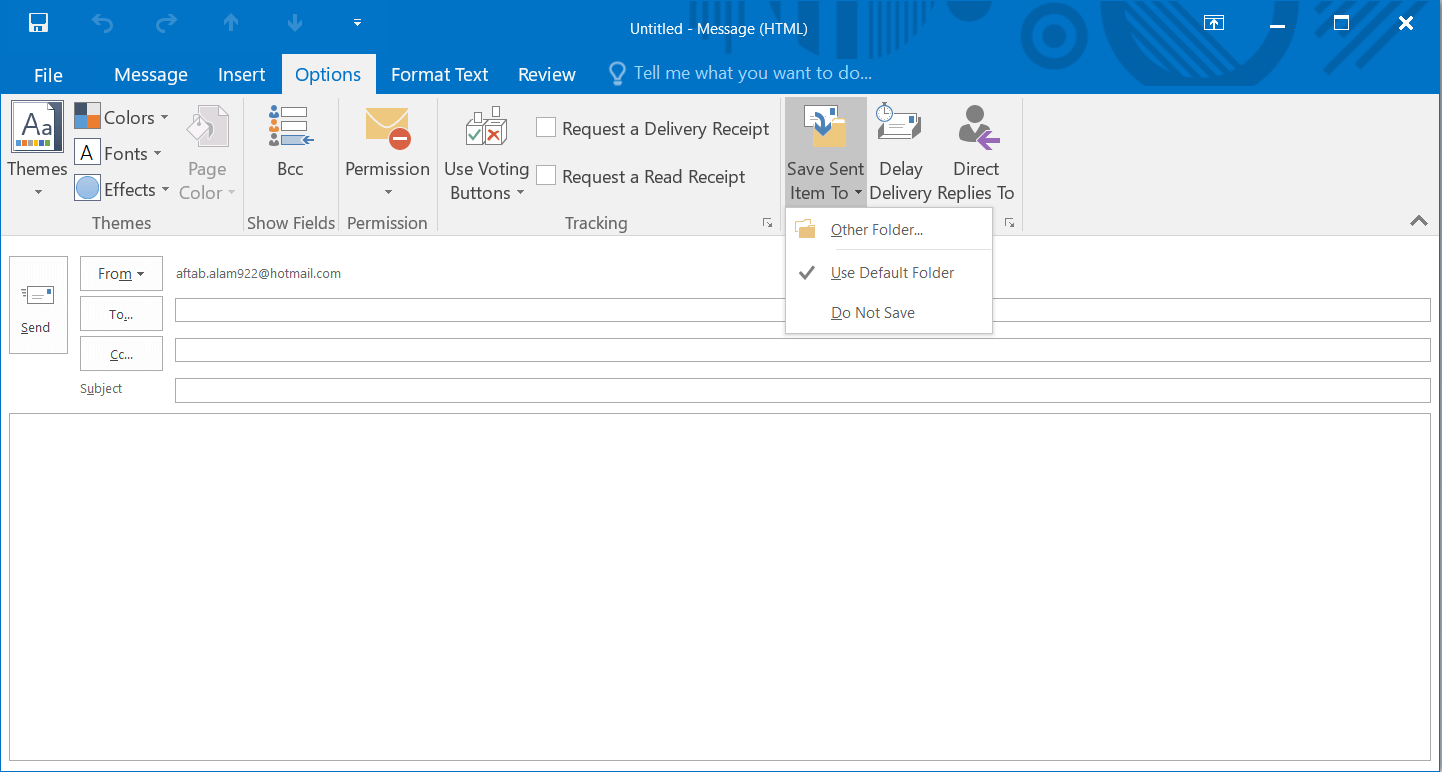
- After opening the Message wizard, go to Options tab and click ‘Save Sent Item To.’ In the drop-down, click Other Folder.
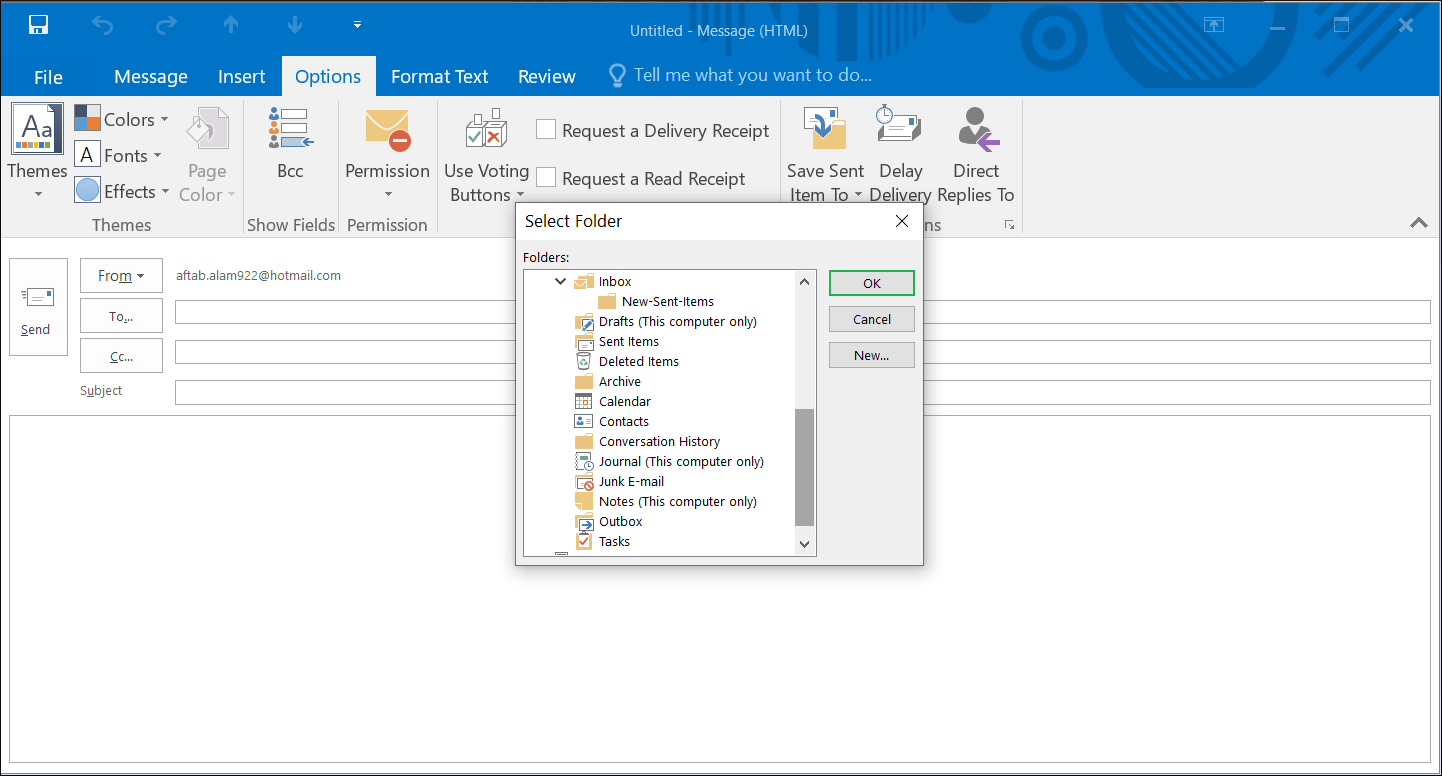
- Choose the folder where you want to keep the sent messages. Click OK.
In the IMAP accounts in the Outlook, sometimes when you have created a rule to move Outlook sent emails to a specific folder, then the message is saved twice. You can overcome such condition by following the below steps;
- Choose the IMAP account, and click Change.
- Click More Settings, then go to Advanced tab.
- In the Sent Items category, click the checkbox Do not save copies of sent items. Click OK.
- Open Outlook and follow File>>Account Settings>>Account Settings.
Now there will be only a single copy of the sent items in the folder.
Conclusion
Due to the large number of benefits of Outlook, majority of business organizations use Outlook extensively. But Outlook is also not immune to the corruption or deletion. If you are facing a problem in Outlook related to the corruption, then do not waste your precious time in using the manual process, but use a professional PST repair software to repair the Outlook Data File.

