Microsoft Outlook has been a wonderful email manager platform all over the globe offering its services to users and making their communications easier. One of the best parts of using MS Outlook is that it allows connections to be made with different email accounts and use their incoming and outgoing web servers like IMAP, POP, SMTP, etc. Therefore set up IMAP to Exchange connection using Outlook becomes very easy. The modern versions of Outlook can do it with Exchange on-premises and Exchange Online. The user can put an email and password for connection as the connecting method is the same for each of the servers.
In this blog, we will discuss the manual method to set up IMAP to Exchange account connection. With that, we will also be able to see information on the correct port number, outgoing mail server, incoming server of mail, and encryption connection.
How to set up IMAP to Exchange connection using Outlook?
To set up this connection there are some pre-required notions that need to be fulfilled. The user should have their Exchange account’s email and password with them while performing the manual method. Also, you must be able to verify the connection of the IMAP client in the Exchange. Now that you have done the two required steps we can proceed with establishing an IMAP to Exchange connection. Please follow the steps as explained below:
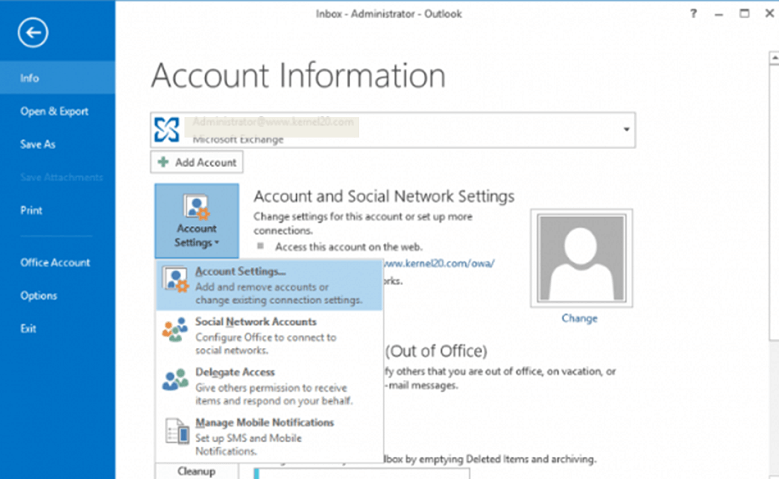
- Launch the Outlook application on your system. Go to File > Account Settings and again Account Settings from the drop-down.
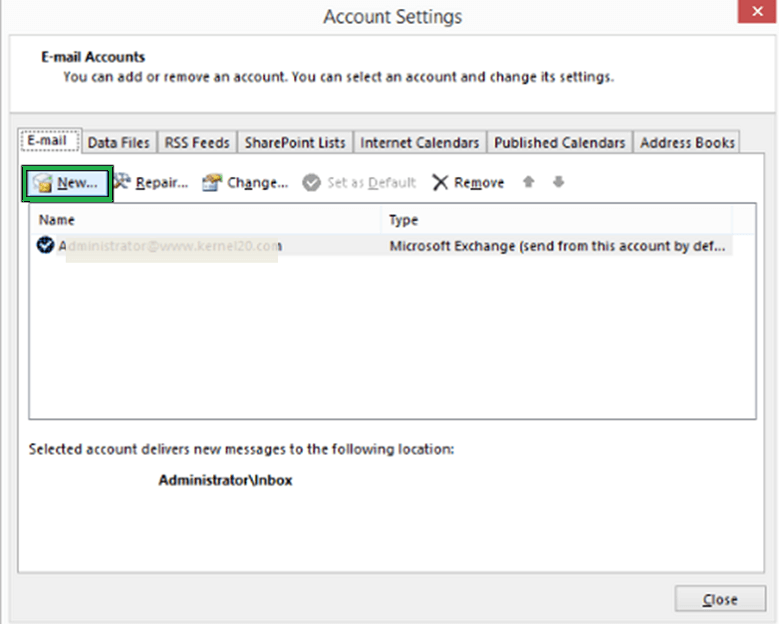
- A new Account Settings window will appear before you. Now, under E-mail, click on the New option.
- Check and select the Manual setup or additional server types option and then click Next.

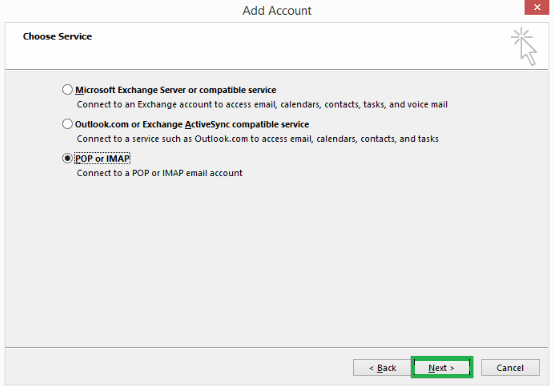
- Next, select IMAP or POP from the three options and click Next.
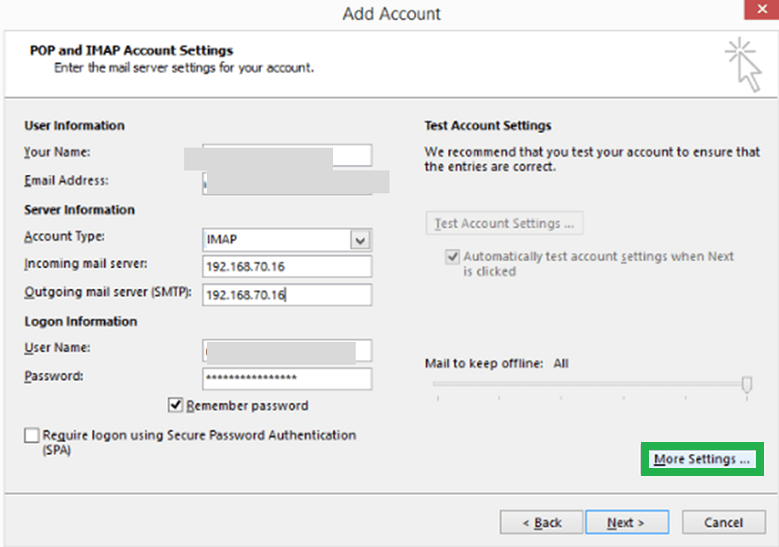
- Fill in all the information related to the mailbox on the Add account window that appeared. You need to put in your name, email address, incoming and outgoing server details, username, and password for the same. Select the server type as IMAP and then click on More Settings.
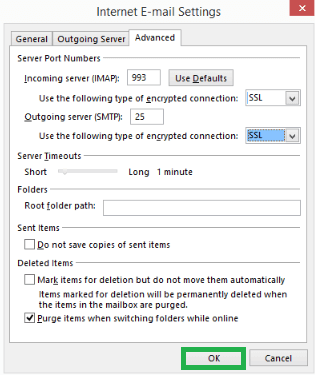
- Now, in the Internet E-mail settings window click on the Outgoing Server tab and check the box against My Outgoing server (SMTP) requires authentication.

- Now, click on the Advanced tab, you need to select SSL as the encryption type for incoming and outgoing servers. Then click on OK.
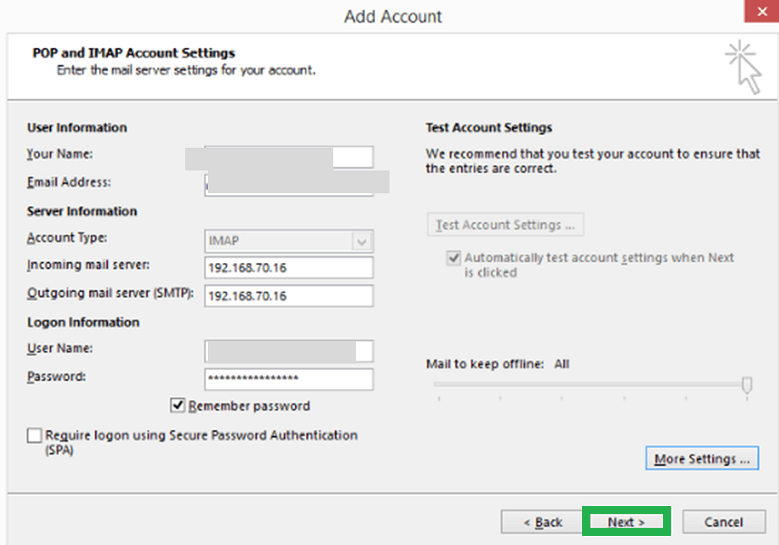
- On the Add, account page check your information again and click Next.
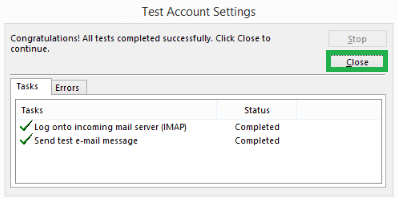
- The Test account settings process will start and show the message as Completed after completion if there are no errors. You can now click on Close.
- In the final step, click Finish to complete this method.
You will now be able to access your company’s IMAP mailbox from anywhere since the connection is completed.
Summing up
Since Outlook is such an amazing email manager with many of its services one is setting up connections with other email accounts. Similarly, set up IMAP to Exchange connection gives an extra advantage to the user of accessing the company’s IMAP mailbox from anywhere. This can easily be achieved using the above-mentioned manual method in sequential steps.