Hyper-V is a hypervisor by Microsoft that allows the user to create multiple virtual machines and run them on the same server. It is very cost-effective and built-in for different editions such as 64-bit professional, enterprise, and educational but only in Windows 8 or later versions. Backing up of data is a mandatory thing for everyone using the latest technology and backup for Hyper-V virtual machines is no different. The data stored needs to be regularly backed up to protect it from getting corrupted or lost due to any reasons. The backing of the Hyper-V hypervisor means resetting the settings and configurations which according to many experts are not regularly needed. On the other hand backing of virtual machines is required and prescribed to be regular. Know how and when to use Use VHDX or VHD files with Hyper-V Environment and import from VHD File to Hyper-V if required.
In this blog, we will know about the pre-requisites for the backup and easy ways to get the virtual machine’s backup done.
Pre-requisites for Hyper-V Virtual Machine
- There may be a chance that the Hyper-V version of your server is different than the Integration components of the virtual machine. You need to make sure that both these components should be in the same version to be able complete the backup.
- There should be enough space on the volume hosting the virtual hard disk files. This space is needed by the Hyper-V during the backup to differentiate between the different disks. The space should be at least the result of this equation- Initial disk size x Churn Rate x Backup time.
- The virtual machine should have a SCSI controller if the VM on the Hyper-V environment is running on Windows server 2012 R2.
Different ways to backup Hyper-V virtual machines
After the pre-requisites, you can move ahead with the backup using the different methods namely two in major categories- Host level or Guest level VM backup. Before moving on to the solutions let’s learn about these two categories first.
Host level VM backup – This type of backup is flexible since it doesn’t require any particular type of OS to perform the procedure. With this type of backup, you can gain a complete backup of the virtual machine or files or folders in it. Host level back is just the VM level or file-level backup.
Guest level VM backup – On the contrary to host-level backup, the guest level backup is the application-level backup. This type of backup is useful to backup specific files which help in accessing the VM easily later on.
1st Method: Exporting Virtual Machines
This method helps restore data to other Hyper-V hosts by exporting the VMs to OVF or OVA templates.
- To start to launch the Hyper-V manager. By right-clicking on the VM for backup select the one you want to backup, and then click Export.
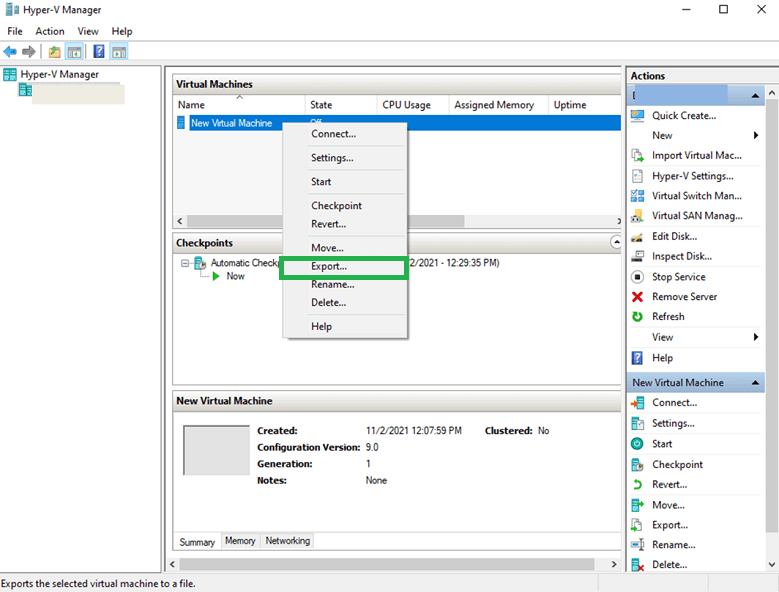
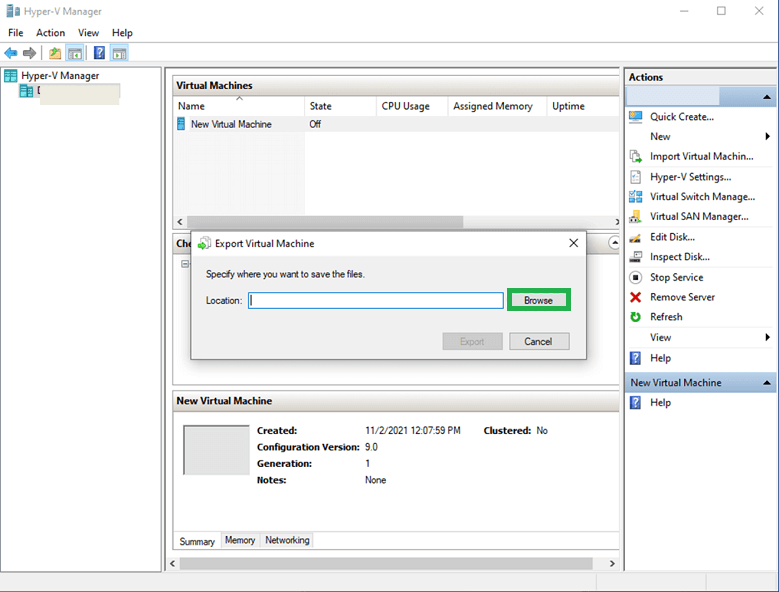
- In the appeared window through the Browse button select a location to save the files.
- As soon as the process is completed you will find three types of folders in the location you specified. The folder will include the VHD files, VM configuration files, and snapshots.
However this method is quite simple, it has the limitation of backing up one virtual machine at a time.
2nd Method: Backup using Windows Server Backup
This is a built-in feature by Windows that helps in backing up Hyper-V VMs along with other features such as backup and restore options for the Windows server environment. This will allow the user to set up multiple automatic backups in a sequence.
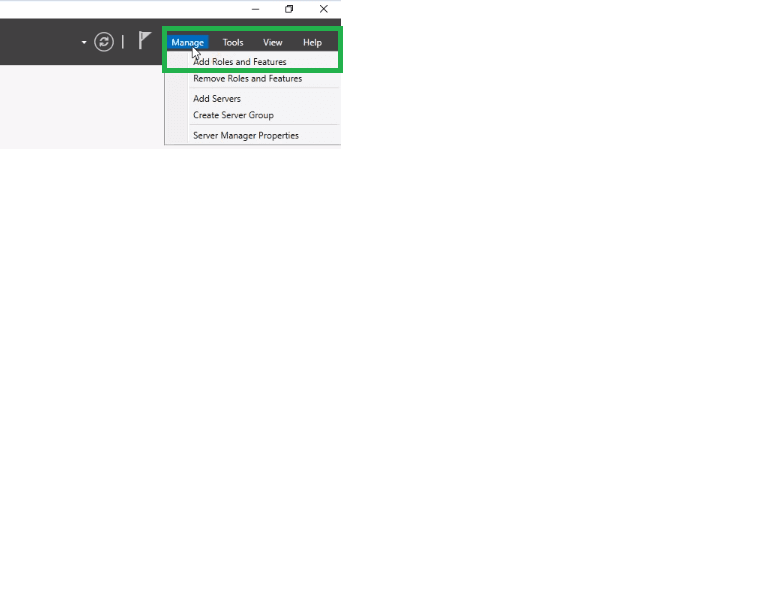
- To start to launch the Server Manager. On the right-hand side of the screen navigate and click on the Manage button to select Add Roles and Features. Now click Next.
- Select the installation type as Role-based or Feature-based. Then click Next.
- Select the Server button and click Next to proceed further.
- Simply click Next on the Server Roles Page.
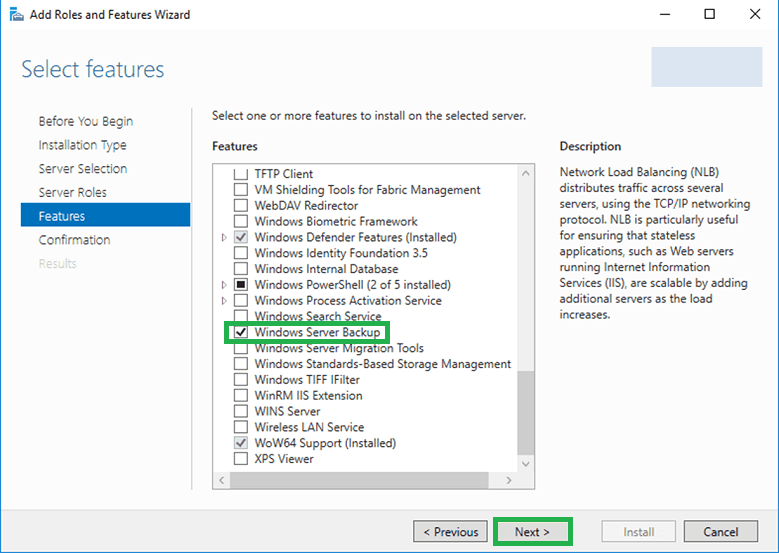
- Click on the Features button, navigate Windows Server Backup, and click on Next to install.
- Now close the window and go back to the Server manager. From the Tools option click on Windows Server Backup.
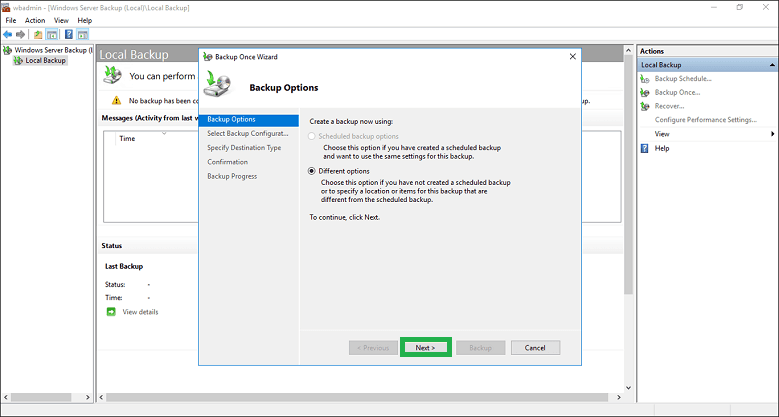
- In the appeared window, from the Action menu click on Backup once.
- Now select Different Options in the appeared window before clicking Next.
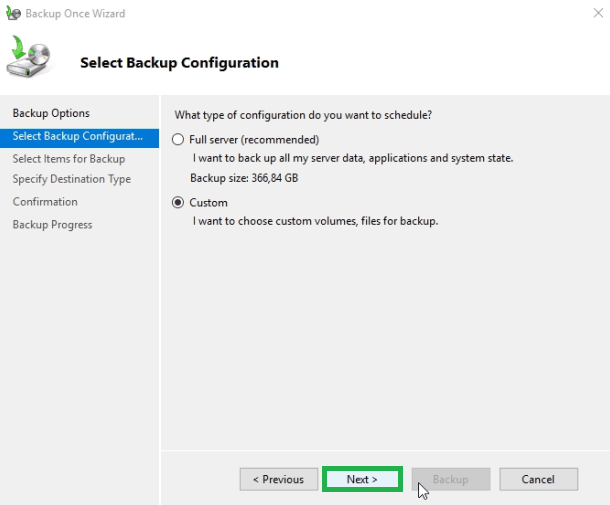
- Select Backup Configuration box will appear where you can choose Custom and choose the files you want to. Then click Next.
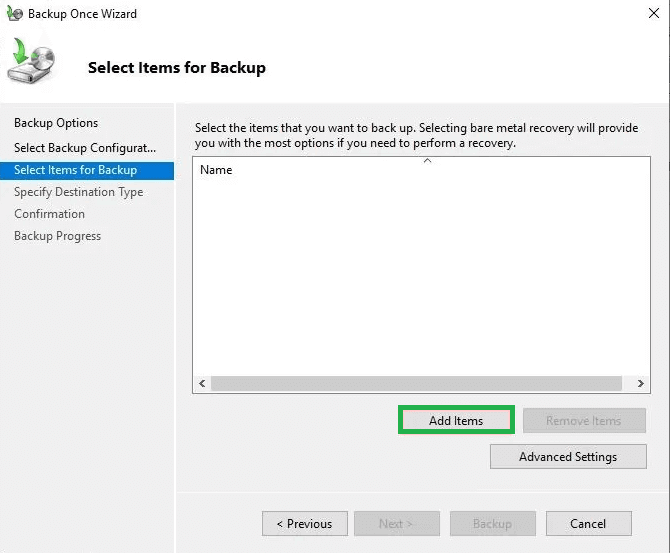
- In the Select Items for Backup wizard click on Add Items to add Hyper-V VM.
- In this step select the Destination Type before clicking Next.

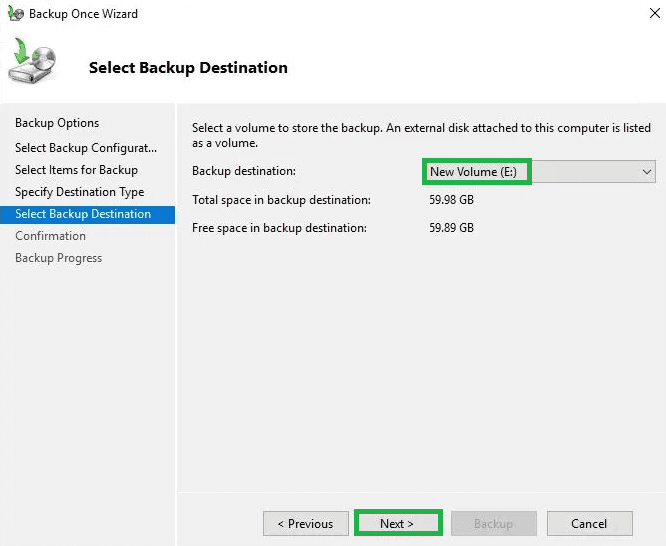
- On the Destination backup option, select a destination folder for the files then click Next.
- In the final step click on the Backup button to start.
3rd Method: Create a copy of the Hard Disk File
This method is fairly easy and simple as you just need to copy VHD files from the VM. This method has advantages such as being easy and straightforward but also has disadvantages such as the data in the VHD file at the time of copying will be available only and nothing after that.
4th Method: Using a Third-party tool
While all the methods mentioned above are very easy and reliable, there are flaws in most of them. The biggest disadvantage is most of them only backup one VM at a time which increases the time for total backup. Third-party tools such as VHD Recovery is easily and readily available on the internet. These tools have a slight advantage over manual methods. Third-party tools are created to repair corrupt VHD files direct and hassle-free and you can back up more than just one VM at a time.
In the end
Just like many applications in the technology, it is important to backup virtual machines in a Hyper-V environment. There are many easy methods to pull off this work where you don’t need any assistance. While in most cases the manual methods work very well it has their limitations that cannot be avoided. For this purpose, we encourage you to use third-party tools for hassle-free and time saving solutions.