With each new version of MS Outlook, Microsoft has made it easier to connect any account with the least information. The user can choose a server and input credentials (email address and password) and the application will connect directly. All the settings related to the account are enabled by default and the mailbox is available instantly after adding the account. But some settings make a significant impact on how the data is saved in the data file.
Cached Exchange Mode in Outlook
This mode works for Exchange accounts that create a seamless environment for online and offline Outlook experience for the user. This mode caches the entire mailbox and Offline Address Book (OAB) in the local computer. Due to this locally cached file, Outlook is not dependent on the constant Internet connection and email server synchronization to access the mailbox.
When Outlook is disconnected from the network, then it shows the last synchronized data. The new data is written to the server after resuming the connection. A user may find cached mode beneficial in the following situations –
- When there is an improper internet connection.
- When the user requires to work in an offline environment.
- When the internet has higher latency (more than 500 milliseconds).
Modern Outlook versions like Outlook 2016 and 2019 prefer cached mode and it remains enabled by default.
Furthermore, the application should remain connected to the server to run multiple tasks and they can become affected significantly when the server is down. These jobs are following –
- Recover policy tips.
- Recover Mail Tips.
- Editing rules.
- Accessing public folders that are not designed for offline.
- Accessing free/busy information.
Enable cached Exchange mode in Outlook
As mentioned earlier if this mode remains enabled in Outlook, but it is disabled, then you can enable it manually too. Follow the below steps-
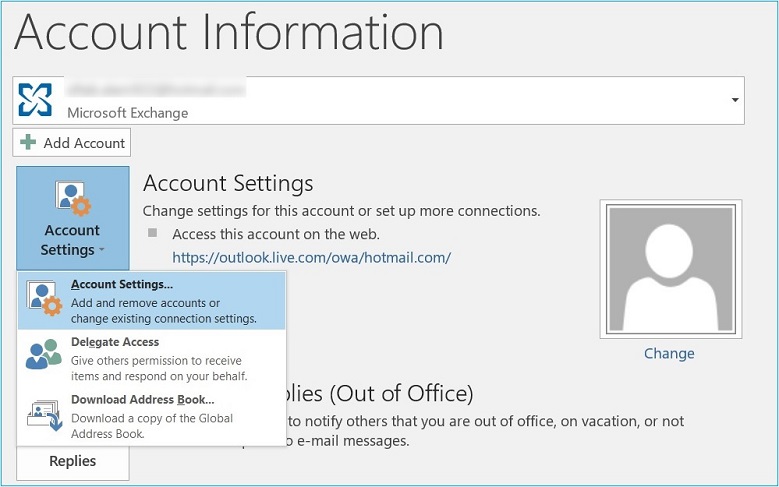
- Open Outlook as Administrator and click the File option. Then choose Account Settings and Account Settings.
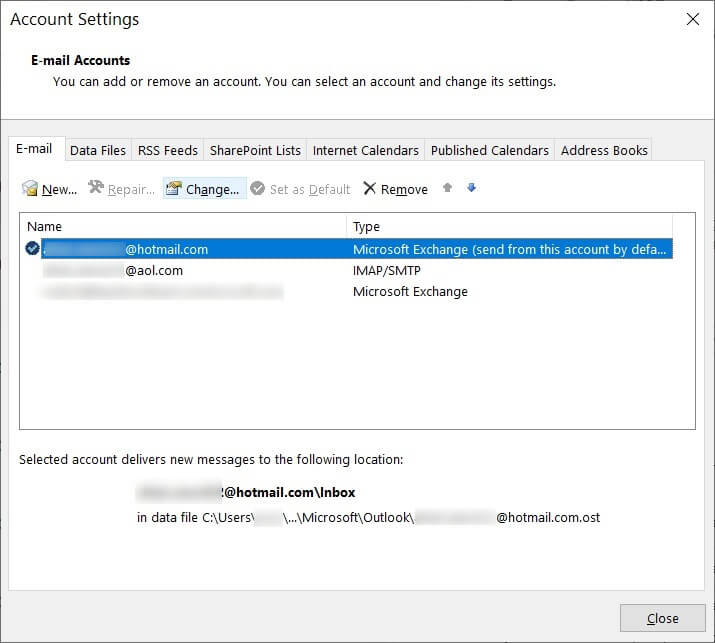
- Choose your exchange account and click the Change option.
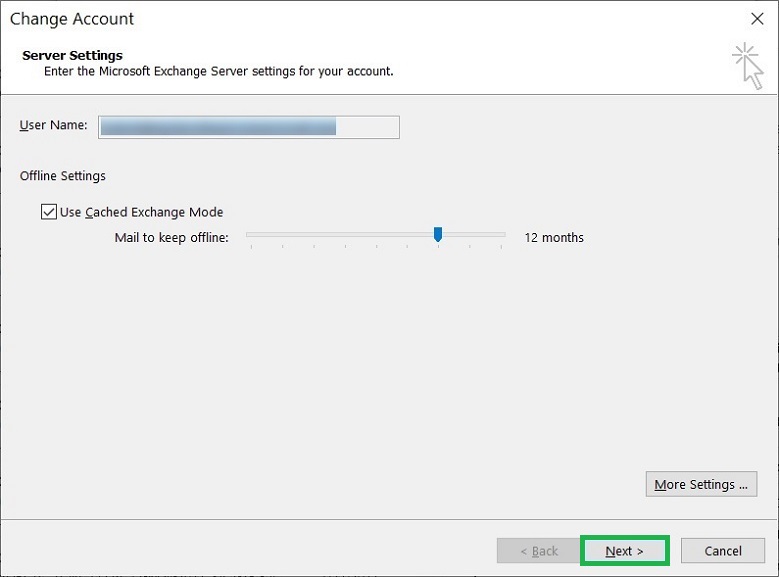
- In the Offline Settings, click the checkbox to Use Cached Exchange Mode and also click More Settings.
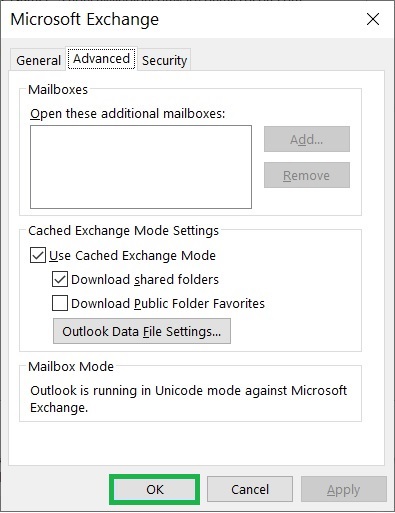
- In the Advanced tab, you can use the checkbox to use cached Exchange mode to download shared folders and public folders. Click OK after making the selection.
How does cached Exchange mode in Outlook affect OST file?
It is highly useful in helping the Exchange on-premises and online accounts with its OST file. Some of the important instructions should be noted-
- In the cached Exchange mode, the OST files are 50 to 80 percent larger than their normal size than their exchange counterparts. So, OST files are less storage efficient than the server data file format. You should make sure that the storage drive has ample space to handle a large-sized OST file.
- While upgrading Outlook to newer versions, if you do not make the settings, then the default settings will be migrated.
- When the new version of Outlook 2016 is installed and cached Exchange mode remains enabled by default, then Outlook creates a new version of the OST file. The older version of the OST file is also kept that can be opened in Outlook 2016 whenever you require it.
- If you do not want to create a new OST file, then you can change the settings in Group Policy and enable the option to ‘Do not create new OST file on upgrade.’ Then, no new OST file will be created while upgrading.
- When the user accesses shared mailbox and nonmail folders from other accounts, then such data is downloaded and added to the OST file.
Conclusion
We have given greater information related to the OST file that is created in Outlook using cached Exchange mode. Additionally, an OST file is important in many ways and the Exchange Administrator can recover corrupt or deleted data from an orphaned OST file too. You may require to access contents from the OST file when the Exchange Server is crashed or facing downtime.
As you cannot import OST files into Outlook, you need to convert OST to PST format and access it in Outlook. You should use a professional OST to PST tool that can not only remove the corruption but provide them a safe method to convert into PST files too. After converting the OST file, all the mailboxes will be saved in PST format and you can access them in Outlook.
I was working on the Outlook 2016 but getting problem in the email communication due to bad internet connection. The cache Exchange mode of my Outlook application was disabled, and this blog post helped me to enable cache Exchange mode via given instruction and I can work without any interruption.