MS Outlook is the most user-friendly application for exchanging emails. It comes with an easy interface to access all the possible information easily. One of the most interesting features
of this application is the Reading pane. This Reading Pane is enabled for all new emails. Therefore, when the users select an email in MS Outlook, it automatically opens in the right pane. It becomes possible for us to view the first line of the email along with the subject.
However, this is not a useful feature. Many times, you may not want others to view your emails. Similarly, by default, MS Outlook can open any email containing an attachment infested with viruses and trojans. It is always advisable to disable the preview pane in MS Outlook. There are many easy ways to undertake this process. Let us explore some easy solutions to fix this issue.
Methods to disable the preview pane in MS Outlook
There are many methods to disable the preview pane in MS Outlook. Let us understand their steps one by one.
Disable Preview Pane in MS Outlook
This is the easiest way to turn off the reading pane. To implement this method, the users can follow the given steps:
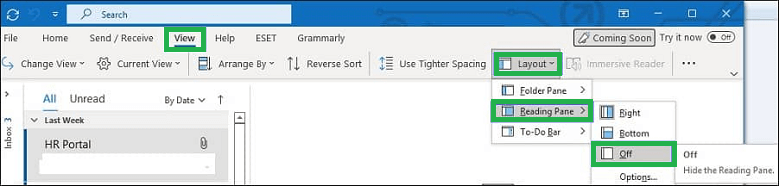
- Go to Inbox in MS Outlook
- Click on View and then go to the Layout section. Click on Reading Pane and select Off
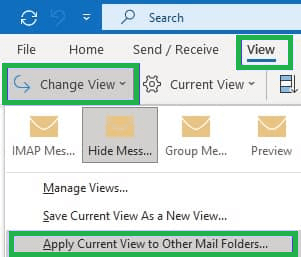
- Click ‘Change View’ on the View tab. Click Hide Messages and select Apply Current View to Other Email Folders
If you are using a Microsoft Exchange Email Account, you can follow the steps to disable the preview pane in MS Outlook.
- Go to the View tab. Click on Compact. Select ‘Apply Current View to Other Mail Folders.’
- The Apply View dialog box appears. Check all the folders under the email account. Check the Apply view to the subfolders box.
- Click on OK to save the settings.
This will disable the preview pane in MS Outlook.
Disable Message Preview in MS Outlook
To hide the Message Preview in MS Outlook, you can follow the given steps:
- Open MS Outlook. Go to the View tab.
- Click on Current View. Select Message Preview and click on Off.
- This will turn off the Message Preview.
Disable Preview Pane in MS Outlook by default
If you do not want to enable these settings every time you open MS Outlook, then you can undertake the steps to ensure that the application opens with a disabled Reading Pane by default. Here are the steps for this method.
- Open File Explorer. Select Local Disk (C:) on the left.
- Type outlook.exe in the search bar in the upper-right corner of the window
- Search for OUTLOOK.EXE in the search list
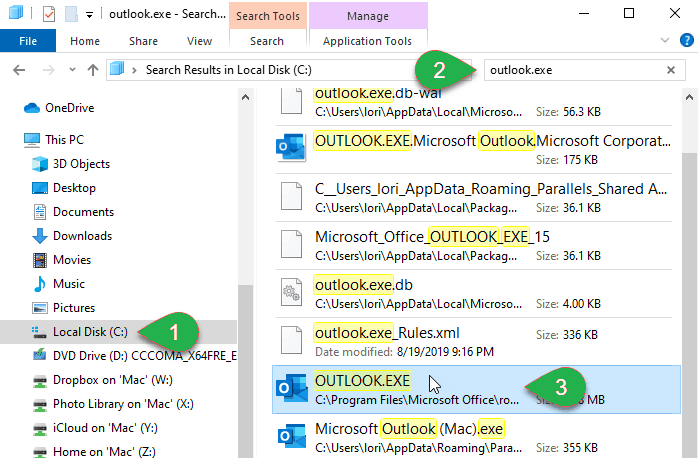
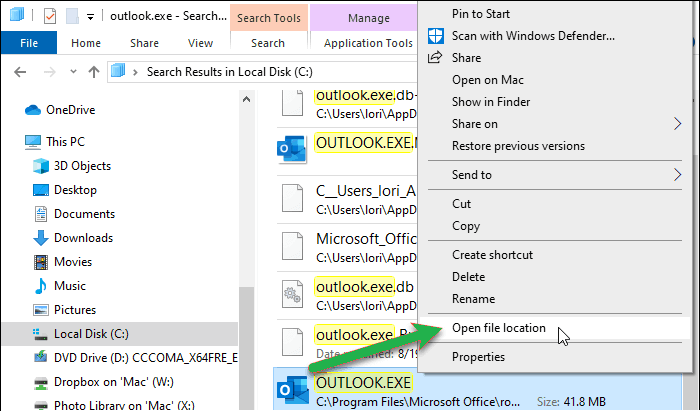
- Right-click the OUTLOOK.EXE file in the results list and select Open File Location
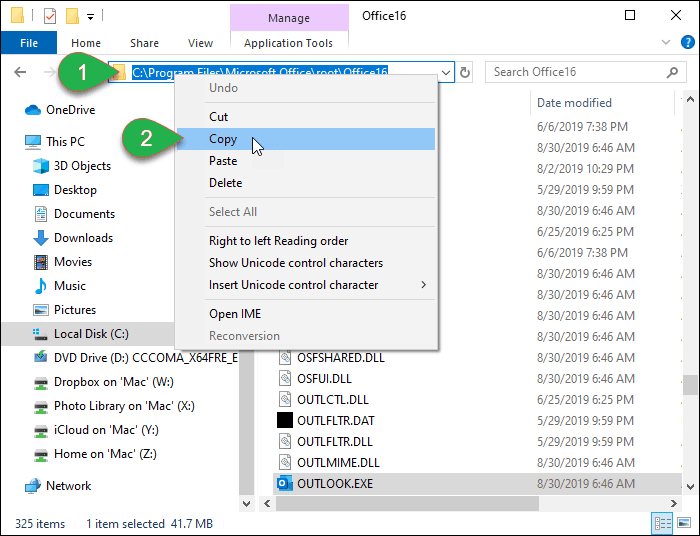
- Click on the address bar at the top of the window. It will automatically select the path
- Right-click on the selected path. Click on Copy from the pop-up menu
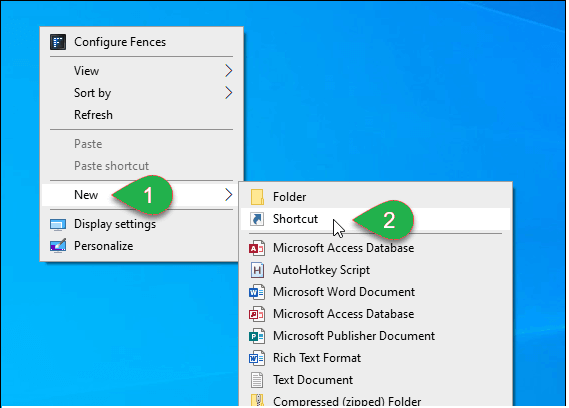
- Right-click on the blank area on the desktop. Go to New and then select Shortcut
- The ‘Create Shortcut’ dialog box appears. In the ‘Type the location of the item’ box, press Ctrl+V to paste the location of the file that you copied in the 6th step mentioned above
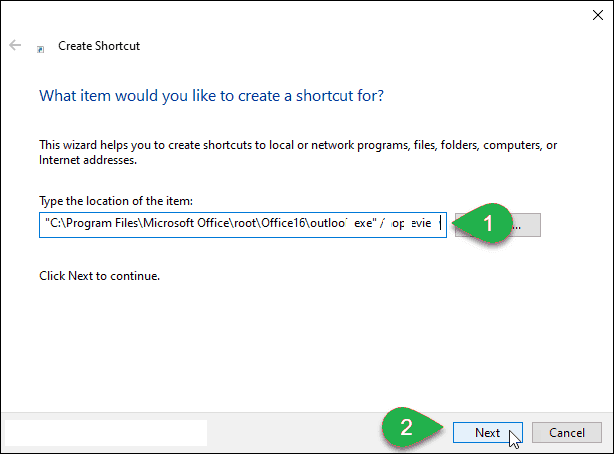
- Click on Next
- Enter the name of the Shortcut and then click on Finish
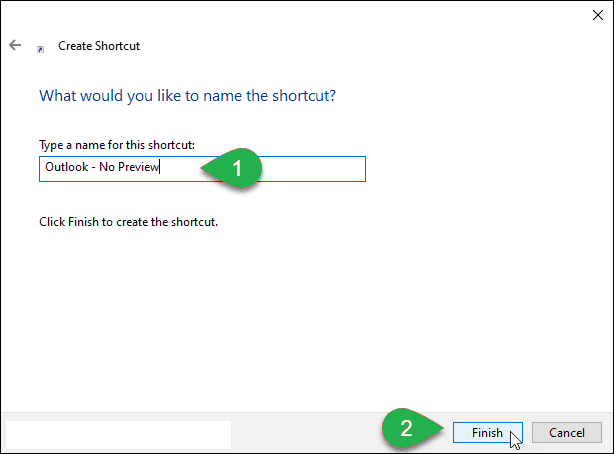
- The new Shortcut of MS Outlook appears on your desktop
- Launch MS Outlook by double-clicking on it. The reading pane is automatically turned off for the application now
Disable Message Preview in Windows 10 Mail
To disable the message preview in Windows 10 Mail, you can follow the given steps:
- Open the Mail. Go to the Settings icon towards the lower-left corner of the window.
- In the Settings menu, select the ‘Message List.’.
- Slide the toggle switches to Off under the Preview text and the Image Preview.
- This will disable the message preview in the Windows 10 Mail easily.
Disable Message Preview on Outlook.com
If you have subscribed for Microsoft 365 subscription, then you can easily disable the message in Outlook.com with the help of the steps which are enumerated below as follows:
- Open Outlook.com. Click on the ‘Settings’ icon that appears in the upper-right corner.
- The Settings menu appears. Click on ‘View all Outlook Settings.’
- Select the Layout Tab and then select the ‘Hide reading pane under the reading pane option.’
- Scrolling down, you will come across the ‘Message Preview Text.’ Select the ‘Hide Preview Text.’
- It will disable the message pane on Outlook.com
Professional MS Outlook PST Repair Tool
It is always convenient to preview the messages through a reading pane. It allows users to save time by accessing the right information. Users can simply mark the emails as read through this feature. It is also possible to customize the font text and size through this option. However, this feature may be dangerous for your system. The emails may contain damaged and corrupted PST files, which can crash MS Outlook.
It is, therefore, essential to repair corrupt PST files as soon as possible to prevent data loss. With the help of MS Outlook PST Repair Tool, you can easily repair corrupt PST files. It saves and recovers most of the lost data in seconds. It resolves all the issues related to the PST files, removes the errors, and stores the data as new files on the system. So, what are you waiting for? This automated tool is very professional and easy to use. It is the best way to protect MS Outlook.
Conclusion
Through this information, it becomes easy to disable the information with the help of easy methods; the users can pick and choose any method depending on their convenience. They do not require any technical assistance. Even if the methods mentioned above are not working, they could surely be an issue with the PST files that may be corrupt or damaged. So, in such a situation, relying on a professional third-party best PST repair tool is the best way to solve the problem.