Tenant name is the identity of the user while subscribing to Office 365. The name can only be entered once and it won’t be changed until the time-consuming process of transferring all the data from the old tenant to the new one. The inflexible nature of the rule of not being able to change the tenant name has both positive and negative aspects. Though it doesn’t look positive in any way in contrast to the popular opinion it is the only way that the data can be accessed. Hence, it is safe. Therefore, it is very important to take your time and think before setting up a tenant name for Office 365.
However, people tend to forget the tenant name and they might need help in finding the tenant name. In this article, there will be shown a few solutions to this problem. These solutions are easy and can be followed by anyone. Though it is expected to work fine; there is a last resort of creating a new tenant and transferring the data from all the Office 365 applications such as Sharepoint, OneDrive, etc.
But first, try out these easy-to-understand solutions step-by-step.
Sharepoint or OneDrive application URLs
As the heading suggests the tenant name is to be found in the URLs of the applications. Just follow the below-mentioned steps to know-how.
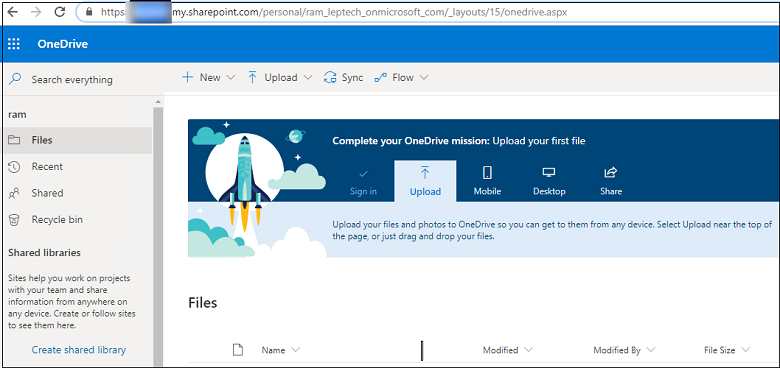
- The first step involves logging into your office account and opens the OneDrive application by clicking on its icon.

- After the application is open you can find the tenant name in the URL. The highlighted text in the URL is the tenant name.
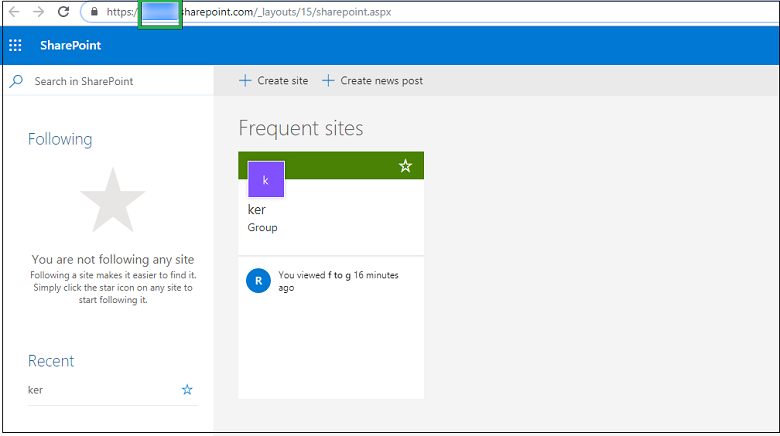
- Similar to the Onedrive application you will find the tenant name in the URL of the Sharepoint application. So after opening the Sharepoint application you can find the tenant name easily.
Office 365 admin center method
Office 365 has the information about the tenant name saved with the other information of the account. Hence through the account, you may get the tenant name.
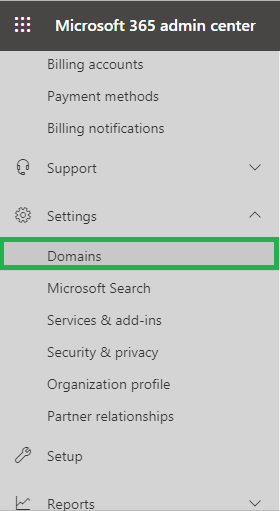
- The first step again involves logging into the Office 365 account with the admin credentials.
- Now, open the Office 365 admin center by clicking on the Admin button.
- In the open admin center dialog box, you will have to locate the Domains button that is under the Settings option. Select the Domains button.
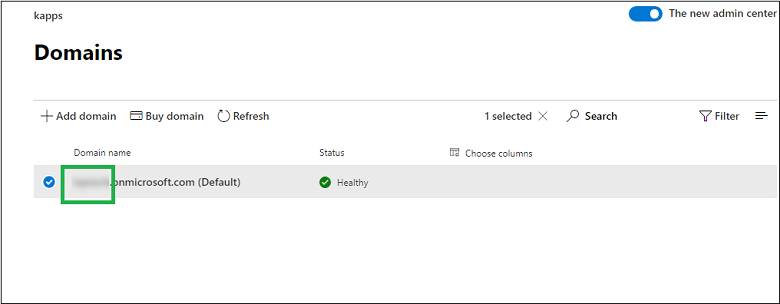
- After the Domains dialog box appears; you can find the tenant name in the highlighted domain name.
Through Powershell Console
After installing the Powershell module and connecting it with Office 365 you can use the following commands in the Powershell command prompt to fetch your tenant name.

Final Say
Taking the time and choosing an easy but distinctive tenant name is very important as it is your unique ID that may come into use as an identifier for the OneDrive policies configuration process. Even if anyhow you lose the tenant name you can use any of the above methods to get the tenant name back. If not found with the above-mentioned methods the only way is to create a new tenant and transfer all the data by copying it from all the Office 365 applications.