Gmail as we know the Google mail application is the most widely used email application. It works as a standard email client for both personal and professional use. And the Google has therefore, provided a total of 15GB storage space for the 3 application services Google Drive, Google Photos and Gmail. As we said, the storage is distributed, the content in any one of these could reduce the total storage space and it affects one another.
Gmail is Out of Space Issue
This is an error or issue generally occurs when a user has failed to receive any message or trying to send any message through the Gmail application. It clearly indicates that there is not sufficient storage space for the emails to send or get received within Gmail. In such case, the user cannot run the Gmail application properly as the main functions access is denied.
It is quite rare that due to emails and considering even attachments in form of media files (not too much high resolution) in Gmail, the shortage of space has occurred. This could be because of the quantity of content within the other two applications – Google Drive and Google Photos.
To ensure which application, out of the three is responsible for this shortage of space error in Gmail application; you can visit this link https://one.google.com/storage on your system. This link will open the drive storage page containing the information of data share among the Google Drive, Google Photos and Gmail applications, buy link for the more storage, i.e. 100 GB and 200 GB and more options. Acknowledge the real issue and then head on the direction to manage data in the particular application directly.
How to Resolve the Storage Space Issue?
You can try the below-given solutions for each application as per your need to free-up the space from the total storage so that the Gmail application will function soundly again.
For Google Drive
Large-sized files in large number could be the reason for grabbing extra space here. You can either delete the unnecessary files from the drive that is not such important or can take the backup of the crucial big files to some other location. One more primary and small step that you can take before taking the backup is opening the Google Drive service page, go to the Trash option on the left panel and then click on Empty trash option to empty the trash box.
Now, the Google facilitates a feature Google Takeout to backup the data to the other location. Let us know how.
- Open the Google Takeout feature on your system.
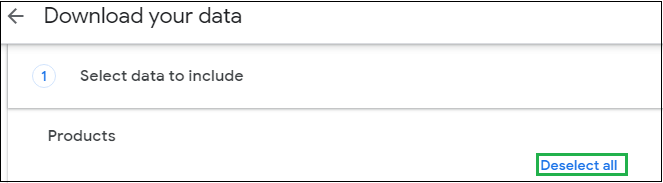
- A page named Download your data will get open. Under Products section, click on Deselect all option as we are concentrating here only on Google Drive service (this feature helps to backup data from all three services).
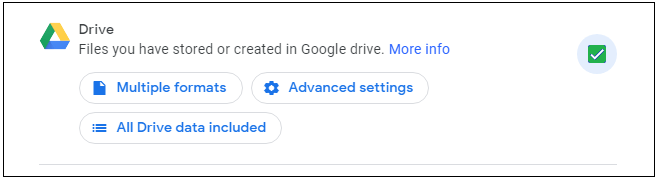
- Now, select the checkbox against Drive option. You can make selections from Multiple formats for your files stored on Google Drive, Drive data for archiving and Advanced Settings as well.
- Once you have selected the settings and options, click the Next step option on the bottom of page.
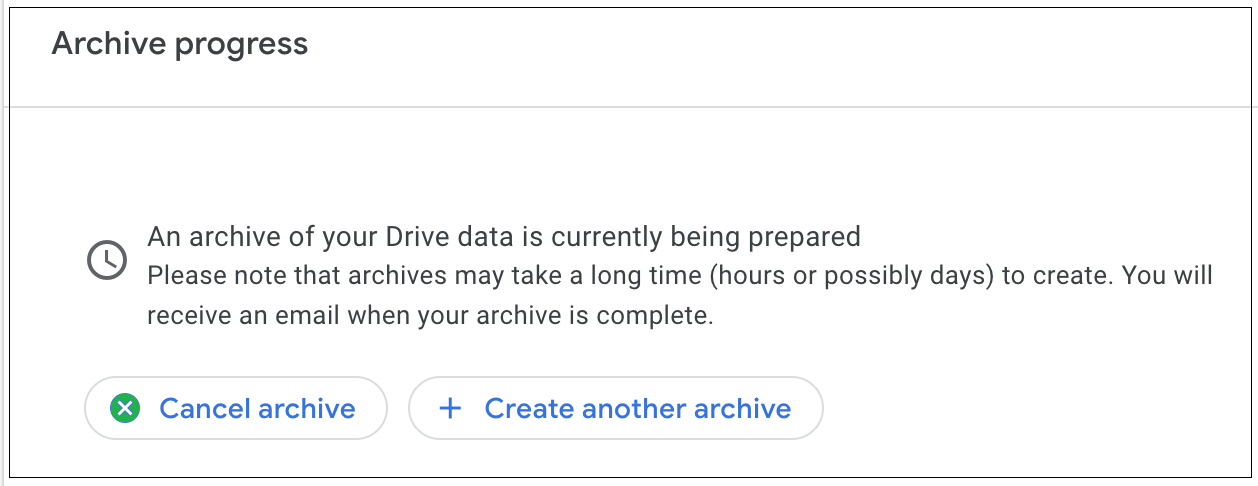
- Next the archiving of Google Drive data will start and shows in progress. Archiving data time would depend on the amount of data being archived.
- Once, the archiving is completed, it will display a message. Click on Manage Archives option.
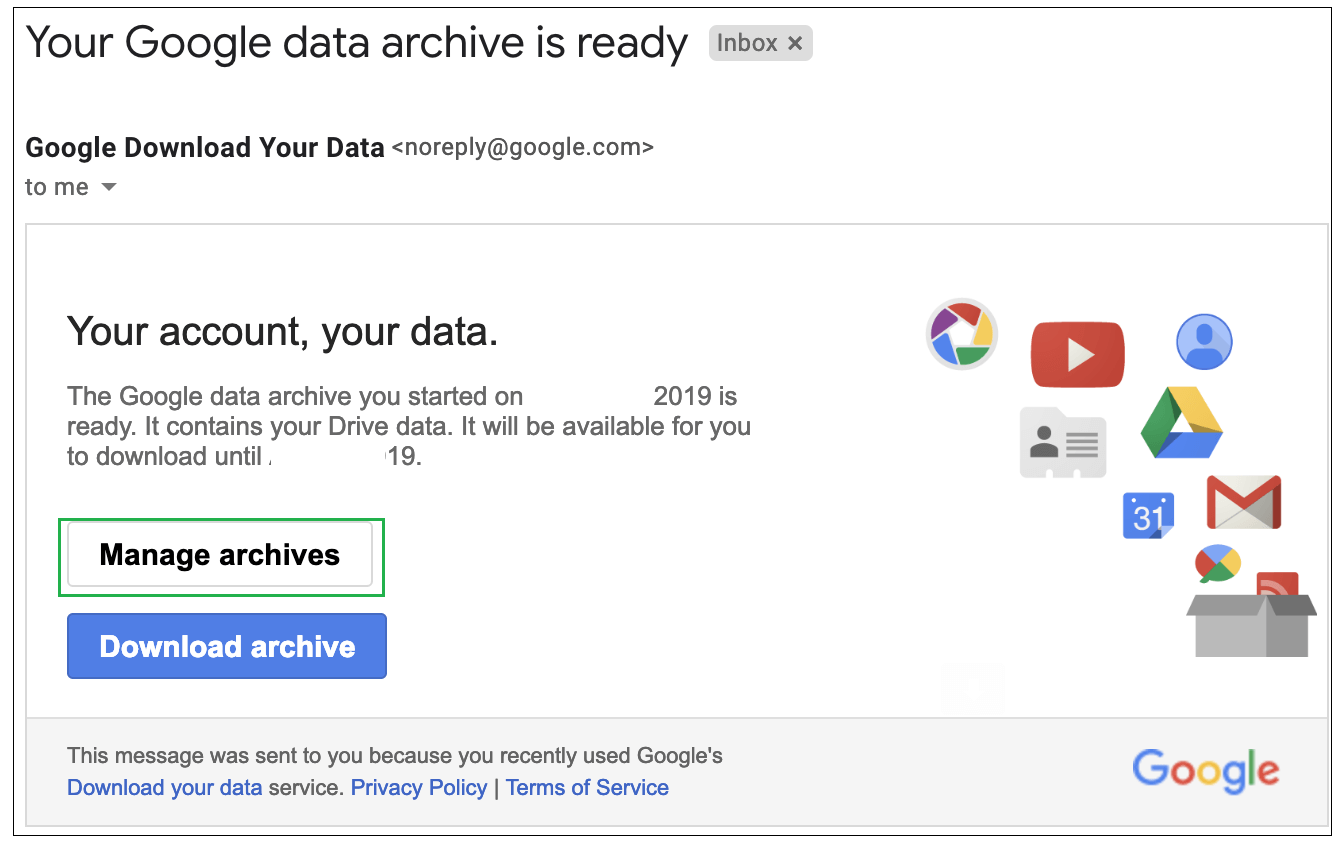
- Here, you can download the archived file in zip folder to save it at your system hard drive.
- So, the Google Drive data has been backed up and this would free up the space from your Google Drive for sure.
For Google Photos
If the Google Photos are taking much space, then the reason might be high-resolution of the images, auto-synchronization for the devices, etc.
Firstly, user need disable the automatic photo backup feature to avoid the later on revival of the data. Users can take try Google Photos Help feature to backup the images, videos, etc. from this service to the PC. After taking the backup, users can permanently delete all the media files from Google Photos.
For Gmail
User can try the primary solutions like deleting the unrequired files, emptying the trash, archiving Gmail data with Takeout feature, etc. Taking advanced backup before deleting the files is suggested for future use.
Add a search like this – Larger:5m,” “Older_than:1y” in the Gmail inbox search filter to search and delete large and older file from the Gmail account manually. Search for large sized attachments with the relevant search filter and save them locally, Then afterwards delete it from the Gmail account.
To search the emails with attachments in Gmail manually, perform the following process.
- On your logged in Gmail account, go to the Search bar and click on the drop-down arrow on the side.
- On the left panel, click on “Has attachment” option and click on Search option.
- Now, all the emails with attachments will get open. Select them all.
- Click on Label option and create a new label for these attachments emails and click on Create.
- Now, use Google Takeout feature to backup these emails with attachments and delete it from the Gmail account further.
Also, users can move Gmail data to another Gmail account through manual solution which requires bit technical knowledge, time and efforts. Let us know the steps required in the process.
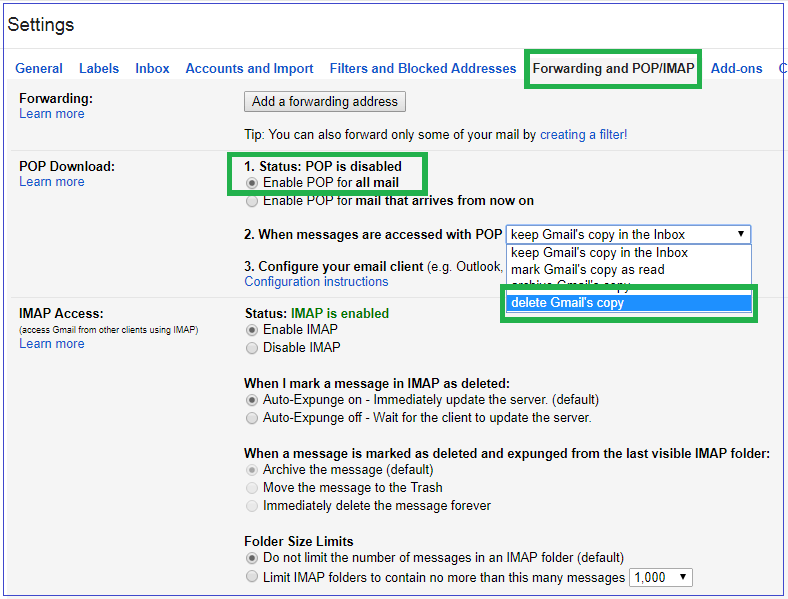
- Open your Gmail account and click the Settings option.
- Click on Forwarding and POP/IMAP tab and select the radio button Enable POP for all mail.
- Under When messages are accessed with POP option, select delete Gmail’s copy option from the drop-down list. The task is completed in the old Gmail account.
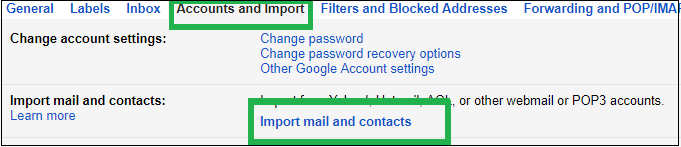
- Now open the newly created Gmail account and navigate to Settings option.
- Select the Accounts and Import tab and click on Import mail and contacts option.
- It will ask you to enter the Gmail ID of the account from which you are importing. Enter your old Gmail account ID and click on Continue option.
- A page asking permission to continue the migration, click on Allow here.
- In the next step, you can select the Import options like contacts, email, new email for 30 days. Select as per your need and click on Start Import option.
- The Import process will get start and complete depending on the data.
- Once the import is completed, data is now available on the new account and deleted from the old account.
If you wish to save your time and work from this manual Gmail migration process which can also result in data loss, we have an automated solution IMAP to Office 365 which saves the Gmail data to the safest cloud location for you. The method is automated, include intelligent filter options and software interface is quite simple. You can try it for the best of solution for Gmail running out of space issue.
Summary
We had a detailed and clear discussion over the main reasons of Gmail running out of space and proposed the suitable manual ways related to it. For users who do not want to engage their time in these lengthy solutions can go with the suggested powerful professional utility as mentioned in the end.