Are you also fed off poor video quality experiences? Well, a lot of users do experience poor video quality. They face shaky, buffer, blur, and inaudible-like video quality problems. The frequent encountering of these issues can ruin the whole watching experience and make it very choppy and difficult to enjoy what they are watching.
Low or poor video quality can also impact users’ work and education. The most irritating thing about low video quality is that it makes us frustrated and ruins the mood. So, in this blog, we will holistically cover this issue. We will know the reason behind poor video quality and explore ways to improve video quality. Read the complete write-up to understand this issue and for the desired results.
List of the reasons behind the poor video quality
- One of the most common reasons is that the video is incompatible with the player. A corrupt external storage device also leads to incompatibility.
- Incorrect video codecs also affect the video quality. When digital videos get encoded, sometimes some common video errors, called artifacts, can appear in the final product. These artifacts can take many different forms, but they all degrade video quality.
- It can also occur due to the video cam, which the user has used to shoot the videos.
- Malware and virus attacks should also be considered in this list.
- Due to incorrect color settings. Improperly configured color settings can make a video look washed out, muted, or otherwise improper. It is often due to incorrect gamma correction or poor white balance settings.
- The inappropriate camera frame rates and shutter speeds can also be the reason for poor video quality.
- The poor audio quality or improper audio-video synchronization can also downgrade the video quality.
Some of the manual tactics to improve video quality
A guaranteed one-stop solution is just an attempt with the manual tricks and tips, but they are a must to follow for once. Below, we have mentioned the best steps and ways to follow if the video quality issue occurs. These are a few checks that should be on your checklist while resolving video quality problems. There might be a different case with every video, so find your issue first before moving ahead. Have a look:
Pre-production crosschecks
We must be aware of the pre-production tactics to improve the video quality. A few of them are mentioned below:
- The user should use an upscale resolution of the video for better quality.
- Use the better online video editor software to increase the video quality in the editing phase.
- Remove or reduce noise, and synchronize video with audio.
- Adjust reframe, fix the shaky videos.
Post-production crosschecks
- Codecs are an essential aspect to check. Correct and synchronized codecs are a must for better quality.
- Check if the video file is corrupted; if yes, then firstly try manually, then going with a professional solution will be a good move.
- You can also try to adjust/change the video quality.
- Another way to improve quality is through Windows Movie Maker. For a saved/already moved video file, under the “Best quality playback for my computer”, go with the “Show more choices”.
- Make a click on the “Other Settings” and choose the quality level; better to be the highest. Just go with the “High-quality video (NTSC)” for this.
- Finally, using the toolbar’s File option, click on the Save to save and proceed.
Steps to set the video quality for the VLC media player
Adjusting video quality for the VLC media player can also improve the video quality. Follow the below-given steps for this.
- Open the VLC media player.
- Go with the Tools option.

- Underneath Tools, select the Preferences.

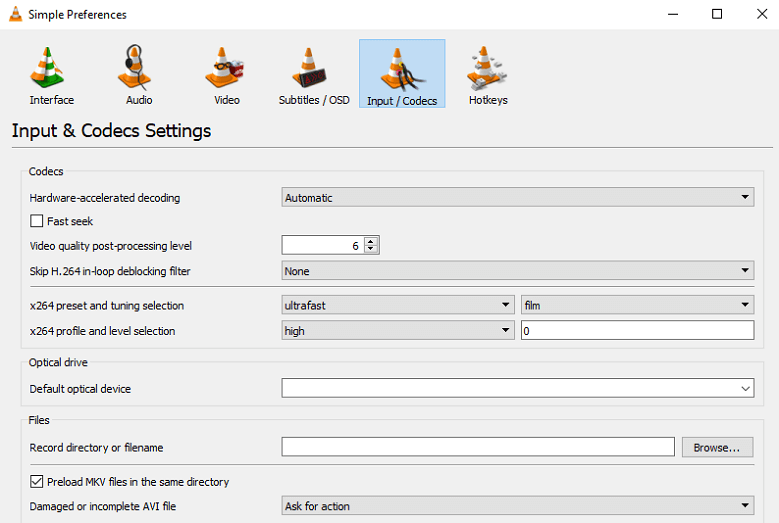
- Now, click on the Inputs/Codecs.
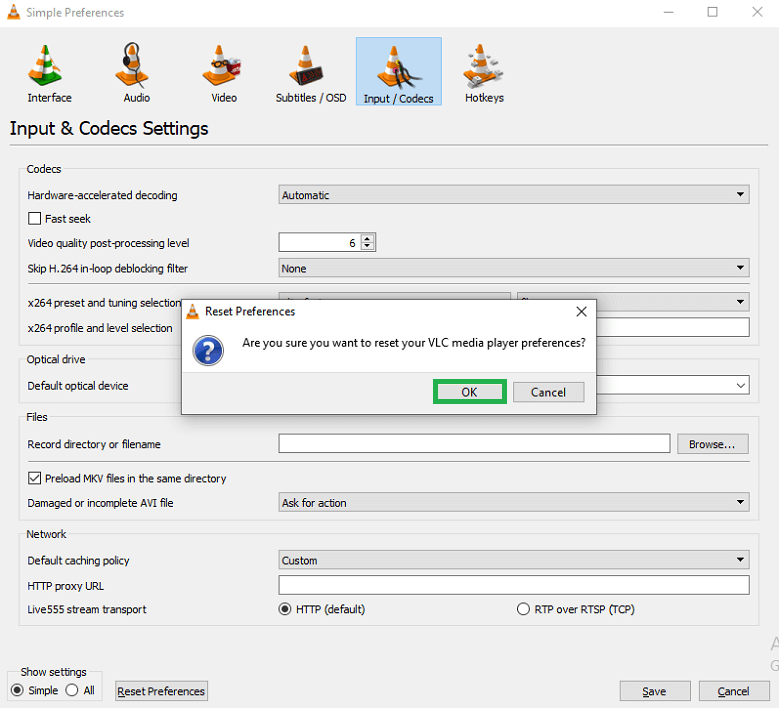
- With this, you can set the preference for the video resolution. Also, you will find other options where you can customize preferences.
- Click on the OK after Resetting preferences and making changes.
- Finally, click on the Save button.
Summary
In the above write-up, most of the dimensions related to video quality have been mentioned. Common Video Errors, Reasons, situations, and solutions that you can try on your own are described. If the video quality issue doesn’t solve, you should give a try to a professional third-party tool. In many instances, manual ways don’t come in handy, like in severe file corruption. Although giving a try the above-described ways is good to go but for the guaranteed results, professional tools provide a one-stop solution. With the third-party video repair tool, you can also save your time and efforts and will get user-centric desired options.
Choose your solution by understanding the problem; finally, the decision will be yours to choose best video repair software.