VHD or Virtual Hard Drive is a virtual file form present on the system. This type of file contains everything from partitions to the filing system of the system. Although the VHD and VHDX file shares the protection by the system there are times when the files get corrupted and deleted from the drive. However, there are solutions to counter this problem that we will discuss in this blog.
What are the possible causes for the corruption of VHD and VHDX file formats?
The computer system files are prone to get errors and disruptions at some point if not maintained properly. Similar is the case with VHD and VHDX files; they are also prone to corruption. Here are some of the most common reasons:
- Sudden accidental shutdown – There may be different reasons for the sudden shutdown of the system but sometimes it creates errors and corruption in files.
- Unintentional deletion of files – Many users may want to clean up their system from time to time which may have to lead them to deletion of files unintentionally.
- Human error – There can be incidences where the error occurs due to human-generated error.
- Virus or Malware impact – A virus or Malware attack on any type of system affects the system files which in turn leads to the deletion of files or losing data.
- Defective Hardware usage – If the user is using defective or old hardware on the system it may lead to failure and create defects in files.
- Installation of Antivirus on the VHD – Installing antivirus on the virtual drive can create many problems for the files.
How do recover lost or deleted VHD & VHDX files?
1 st Solution: Use Hyper-V for recovery
- Launch Hyper-V on your system and tap the Edit Disk option.
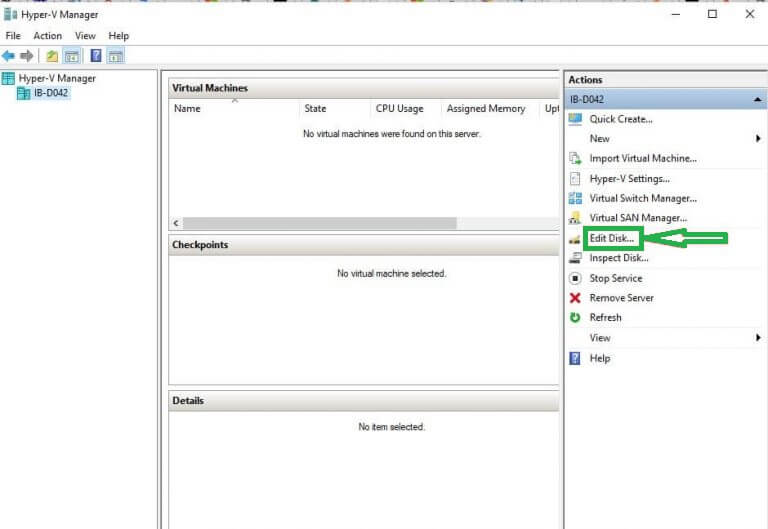
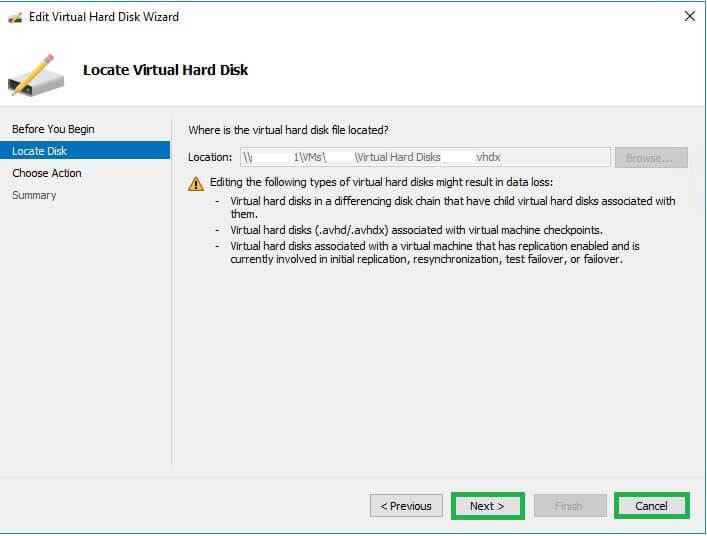
- Choose Locate Disk on the left pane in the appeared window. Then from Browse locate the affected VHD files before clicking Next.
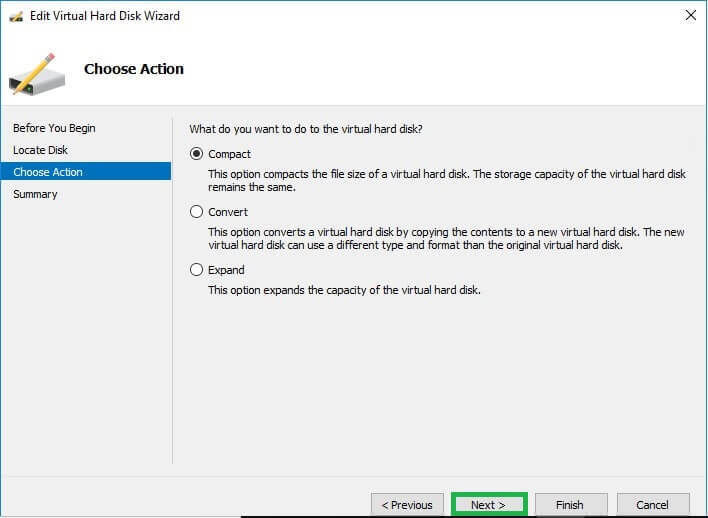
- In Choose Action option, select Compact and click Next.
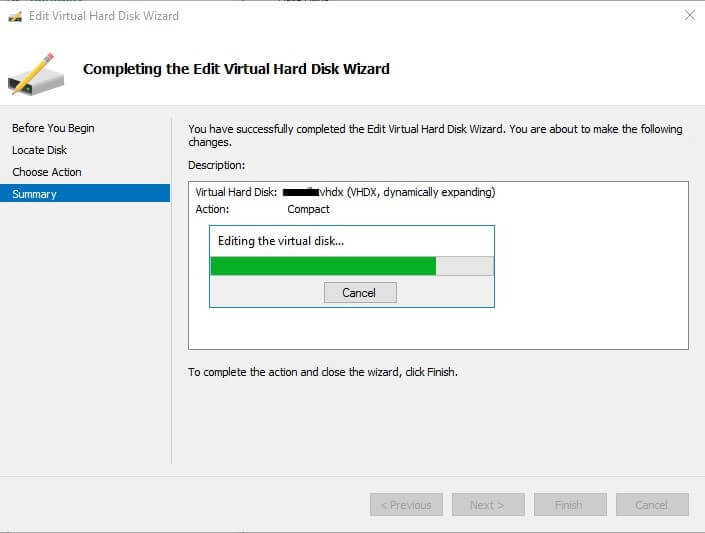
- When it’s done you can click on Finish to complete the process.
- Rename the VHD file.
2nd Solution: Mount the VHD file
This method works when you mount .vhd using a command prompt to help repair and restore windows from VHDX files. Here are the steps to do so:
- Under a parent partition open Command Prompt and then type CHKDSK so that it starts the VHD file repairing process.
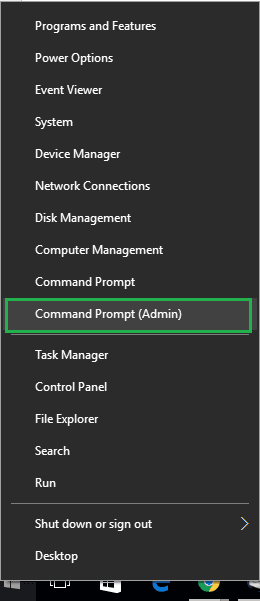
- Use Hyper-V virtual machine to verify if the .VHD file is authentic or not.
- VHD/VHDX files will then be added to the IDE controller for the inspection process.
- Download the VHD repair tool with a free repair option. This will allow you to get back on expanding mode with base VHD when multiple VHDs are available.
3rd Solution: Using Windows PowerShell recovers Deleted VHD/VHDX files
- Launch Windows PowerShell on your system as administrator.
- Now type Mount-VHD –path d:\folder\vdisk.vhdx –ReadOnly then hit Enter.
- In the next step type optimize-VHD –path d:\folder\vdisk.vhdx –Mode full and Enter.
- In the final step type Dismount-VHD- path d:\folder\vdisk.vhdx then hit Enter. The path mentioned d:\folder\vdisk.vhdx is the path of the corrupted VHD file.
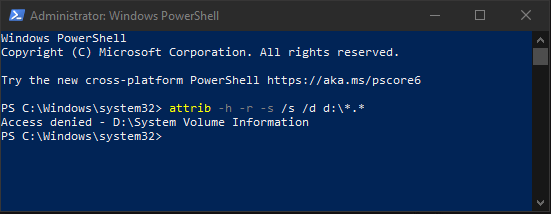
4th Solution: Recovery using Diskpart utility
- Diskpart utility is a built-in Windows tool. Click on the Start button and search run. After the run command window appears type cmd in it.
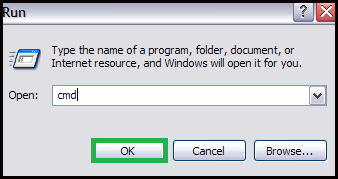
- Right-click on the command prompt and click Run as administrator so that the command prompt is open.
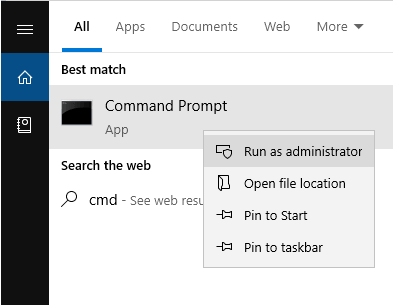
- Type Diskpart > Enter.
- Type select vdisk file=”d:\folder\vdisk.vhdx” and press Enter on keyboard. d:\folder\vdisk.vhdx is the location of corrupt VHD file.
- Now type attach vdisk readonly before hitting Enter.
- Then type Compact vdisk and press Enter.
- In the final step type detach vdisk > Enter> type Exit.
5th Solution: Recovery using virtual machines
To repair the damaged VHD files you can create a virtual machine on your system.
- Firstly create a new virtual server on your system and then connect your hard drive with it.
- Locate the Settings option and click on it. Now select the newly connected hard drive and choose the file to repair.
- Click on the Virtual disk wizard button and choose Compact and proceed to Convert it to a fixed size virtual hard disk option.
- Finally, save your new fixed VHDX files with a new name.
6th Solution: Automatic fix using a third-party tool
Third-party tools are time-saving and easy to use and fix the VHD and VHDX files automatically. Therefore we recommend using the third-party tool in case none of the above methods work. There are many third-party tools easily available such as the VHD recovery tool which also have many other features useful for the users.
Summary
Just like other files on your system VHD and VHDX files are also prone to get corrupted or damaged. However, there are solutions available that can be used to easily solve this problem. Even if the manual solutions don’t work third-party tools can still be used to solve this issue.

