Outlook Web Access (OWA) is the web-based equivalent of the Outlook application and it works on the browser. It’s the look and feels that is similar to the Outlook and gives you the flexibility of accessing your mailboxes irrespective of your location and the need for the presence on Outlook on the computer.
The user will find the majority of the functional aspects of the Outlook present in the OWA like a familiar interface and all the properties required to maintaining the professional email communication.
The user can find the OWA mailbox by following the unified login page, choosing the webmail, and then input the username and password.
Importing PST File to Outlook Web Access
Method 1. Using Import Method
If you have created an OWA account and want to import your older emails to the new account, then you can import PST to Outlook Web Access by following the below steps;
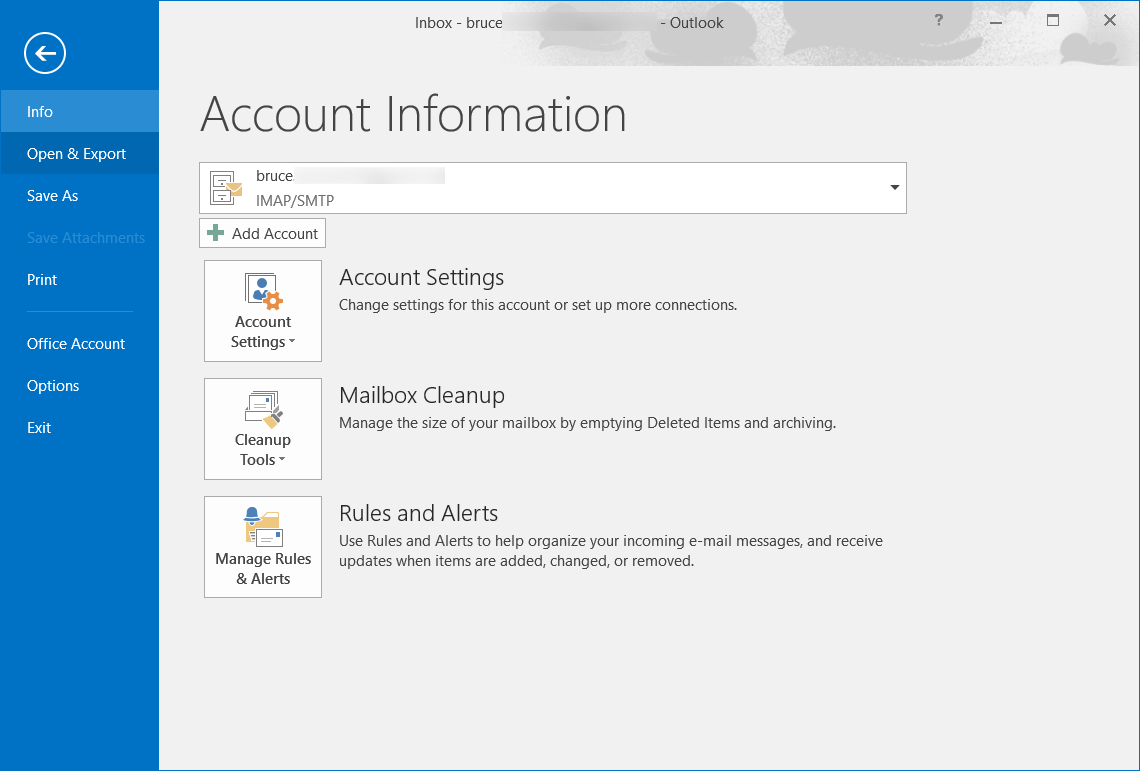
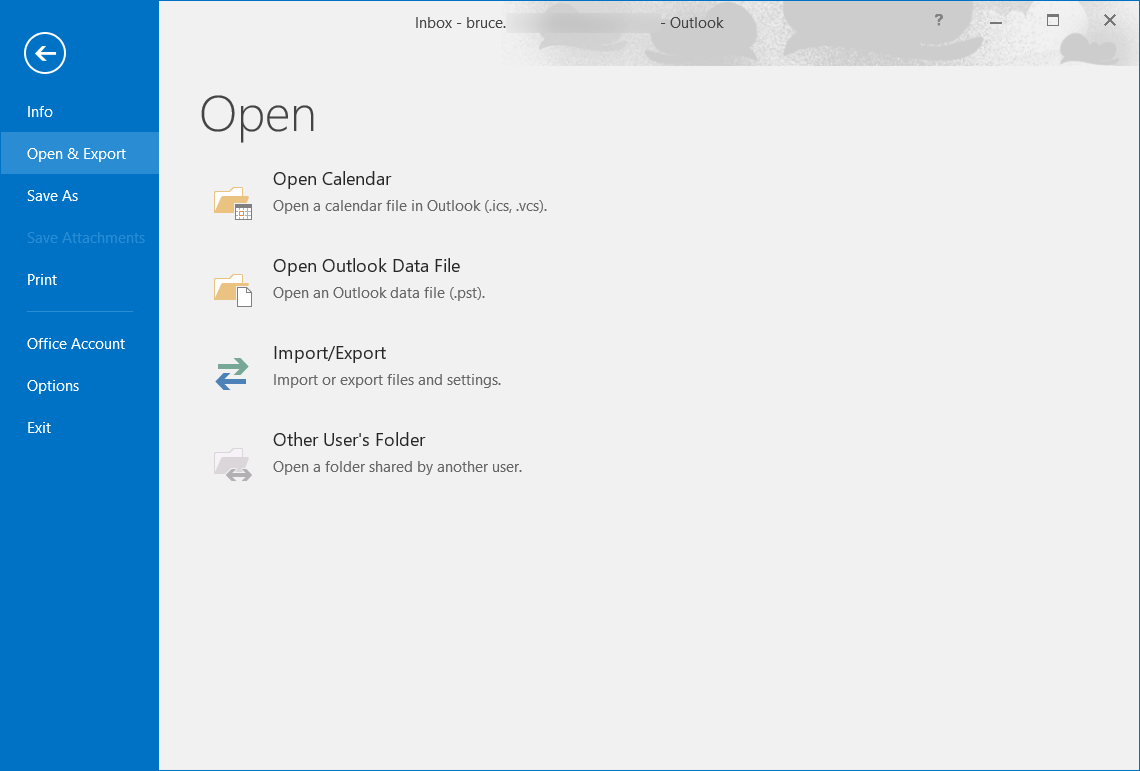
- Click File in the Toolbar and then go for the option Open & Export.
- Click the third-option of Import/Export.
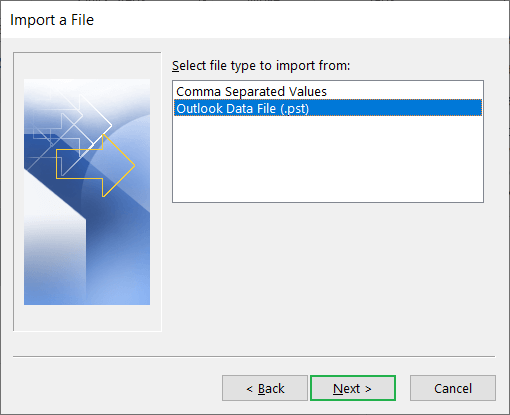
- Find and click the option ‘Import from another program or file.’ Then click Next

- Click the second option ‘Outlook Data File (.pst).’ Then click Next.
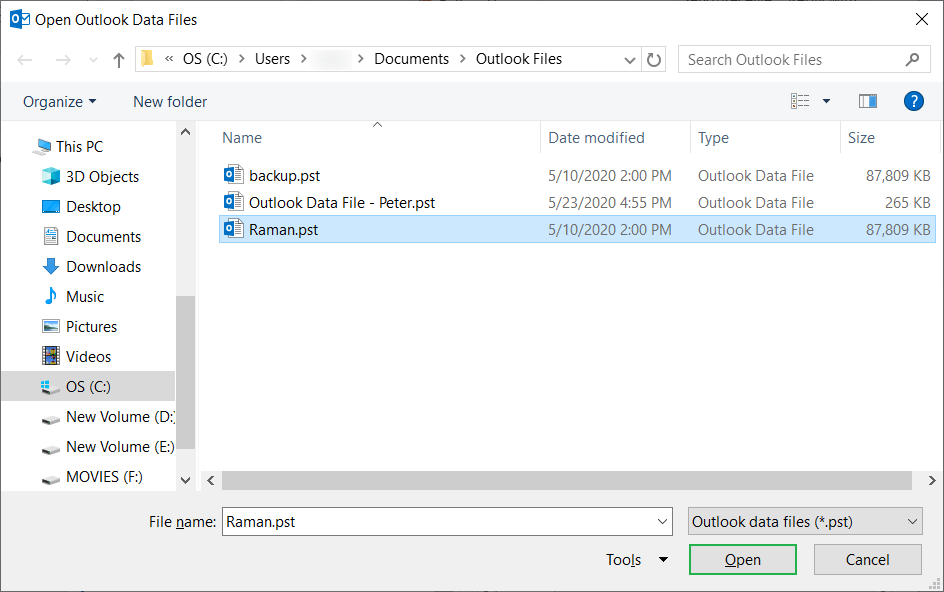
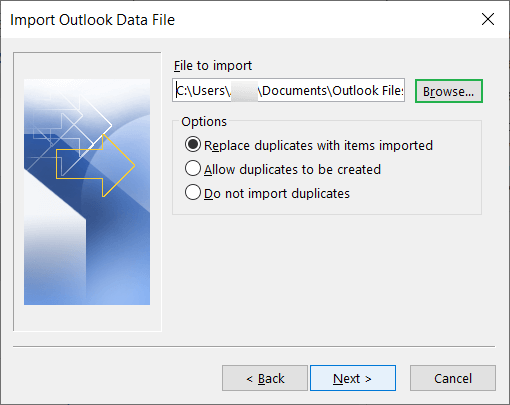
- Click the Browse button.
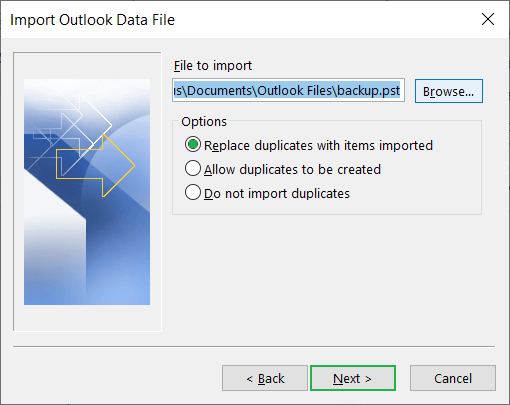
- Select the appropriate PST file and click Open.
- After choosing the PST file, you need to select the option to handle the duplicate items. There are 3 options for you;
Replace duplicate with items imported.
Allow duplicates to be created.
Do not import duplicates.
Click Next.
- Click the checkbox to include the subfolder present in PST files. To apply the filters to the emails, click the Filter button. Also, you can make the selection of importing the PST file as a separate mailbox or import it into the same folder.
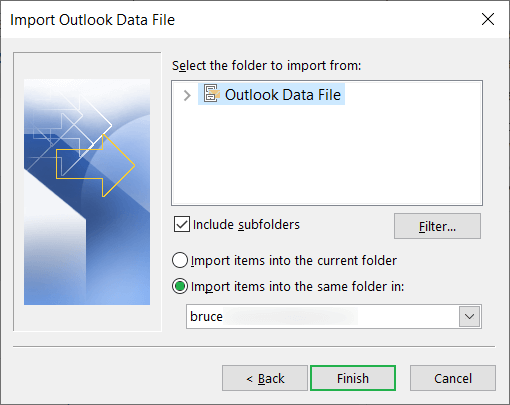
At last click Finish.
The PST file’s information will come to the OWA account instantly and you can check the presence of the new data in the mailbox.
Method 2. Using Network Upload method
If your OWA account is associated with the Exchange Online (Office 365), then you can upload a bulk of PST files to Office 365 using the Network Upload method through the Security & Compliance Center. Here are the steps of the Network Upload method in a brief;
- Download the AzCopy.exe tool from the Import page in the Security & Compliance Center. You will also get the important access keys that have the necessary permissions to upload the PST file to an Azure storage location. The access keys are unique for the organization and they stop the unauthorized access to the PST file as the Azure storage location.
- Upload the PST files to the Azure storage location at the Microsoft cloud using the AzCopy tool. The storage location for Azure Cloud is the same as the regional Microsoft datacenter where the company’s data is stored.
- After uploading the PST files to the Azure storage, you need to create a comma-separated value (CSV) file that will have the information of the Office 365 mailboxes that will receive the specific PST files.
- Go to Security & Compliance Center and create an Import job for the CSV file that you created in the previous step. The Import job will analyze the data present in PST files and will allow you to provide the filters to the PST file.
- After starting the import job, Office 365 will use the information present in the CSV file to match that which mailbox will receive the information from which PST file present in the Azure storage location. You can see the status of the Import job at the Import PST files present in the Security & Compliance Center.
After the finishing of the job, the status of the Import PST files will change to Complete.
Method 3. Use Drive Shipping method
If the size and number of PST files are too large, then you can use the drive shipping method to import PST files where you will keep the PST files in the BitLocker-encrypted hard drive and then ship it Microsoft.
Microsoft will store the PST files to the temporary Azure Storage location and then you can import the PST files to the mailboxes using the Import PST files using the Office 365 Import Service.
Limitations of above Methods
The above method gives a reliable solution to import PST to Outlook Web Access but there are some limitations as following:
- All these methods are very complicated and require technical expertise to perform these methods and other additional task. It is not possible for non-technical users.
- The maximum limit is 2GB for importing PST to Outlook Web Access with the Network Upload method.
- If you do any wrong commands that can lead to loss of your PST data and you will have to start it again.
Import Multiple PSTs to Outlook 365 directly
If you want to import multiple PSTs to Outlook 365, then you should use Office 365 PST Import tool. Whether you do not have any need to go through the process of further configuration an Outlook 365 account in MS Outlook.
You can simply add more than one PST files from your system or the domain network using this tool. So without the supervision of user the tool can perform the all migrating activities.
You can further migrate the same PST files at the second time using this tool. The tool also allows selective PST file item transfer on the basis of category and date filter. The program retains the complete email metadata and excludes unnecessary folders like Sent Items, Deleted Items. Overall, this tool is the perfect solution for the all users who want problem free to import PST to Outlook Web Access. Steps to import PST files to Outlook 365 Web are given below-
- Download and open the import utility tool.
- Then Login into the tool with Administrator account
- Now Use Add File/Folder option to import PST files.
- Map the PST file and Outlook 365 account and Validate.
- After that select the category of items to import from PST files and click on the Start button.
- At least the tool will start importing PST files into Outlook web app in bulk and prepare the report once the process is completed.
Conclusion
The manual methods to import PST to Outlook Web Access are limited and needs much time and permissions to complete the job. The network upload method will migrate the PST files for up to 2 GB only and will need multiple permissions to start the process. That’s why you should use the professional software that can support the PST file as the source and migrate to any version of Office 365.