Exchange Server 2016 has given new heights to the business that were constantly using Exchange Server as a dedicated mail server. It can collaborate with the SharePoint and OneDrive easily, its cloud infrastructure is available on the mobile devices like Smartphones and tablets from both iOS and Android. There is a robust Database Availability Group where the database can overcome any failover, and there are multiple features that are proactive enough to handle all the failure or threats independently.
Exchange Server Migration Guides
Migrate Microsoft Exchange Server 2010 to Exchange 2016
Migrate From MS Exchange 2013 to Exchange Server 2016
Migrate MS Exchange Server 2016 to Exchange 2019
Pre-requisite to Migrate Exchange Server 2013 to 2016
When you have decided to migrate from Exchange Server 2013 to 2016, then before installing the Exchange Server 2016 you need to get the complete requirement of the Server in terms of Hardware, Software, Network etc. The Administrator should also know about the coexistence of current and the previous servers.
- Hardware Requirements
Processor Intel Processor supporting 64-bit processor/AMD Processor supporting AMD64 platform. Memory size Mailbox Role: 8 GB Minimum.
Edge Transport Role: 4 GB Minimum.Paging File Size Minimum physical RAM plus 10 GB.
Maximum Physical RAM 32 GB.Disk Space 30 GB of free space on the drive where you are installing the Exchange Server.
200 MB of free space on System Drive.
500 MB of free space for message queue database.File Format NTFS for System partition, Exchange binaries, Exchange Diagnostic logging file, transport database files. Drive DVD-ROM Drive. Screen Resolution 1024*768 pixels. - Software Requirements
Windows Windows Server 2012.
Windows Server 2012 R2.
Windows Server 2016.Mailbox and Edge Transport Server Roles - Windows Server 2012 Standard or Datacenter
- Windows Server 2012 R2 Standard or Datacenter
- Windows Server 2016 Standard or Datacenter
Management Tools - Windows Server 2012 Standard or Datacenter
- Windows Server 2012 R2 Standard or Datacenter
- Windows Server 2016 Standard or Datacenter
- Windows 10 with 64-bit
- Windows 8.1 with 64-bit
.NET Framework 4.8, 4.7.2, 4.7.1, 4.6.2 Supported Clients Microsoft 365 Apps for enterprise, Outlook 2019, Outlook 2016, Outlook 2013, Outlook 2010 SP2, Outlook 2016 for Mac, Outlook for Mac for Office 365.
Install Exchange Server 2016
After checking the prerequisites for the Exchange Server 2016, you can go to Microsoft Download Center and Download Exchange Server 2016. Go to Windows Server on which you want to install it.
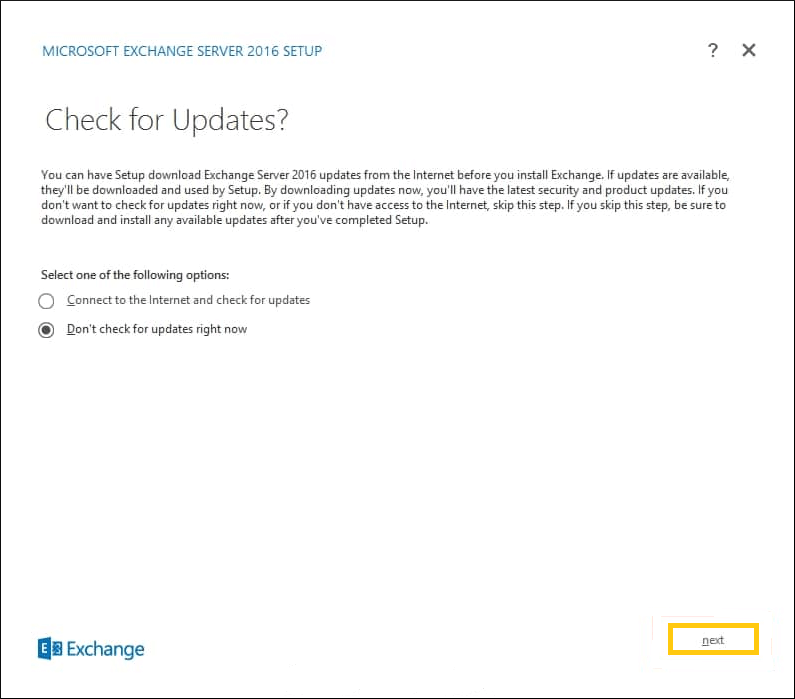
Go to the navigation file where the installation files are present. Find the Setup.exe and double-click it. It will open the first page of Exchange Server installation called Check for Updates.
- There are two options to handle the updates. First one is to connect to the Internet and check for updates and next one is do not check for updates. Choose any one and click Next.
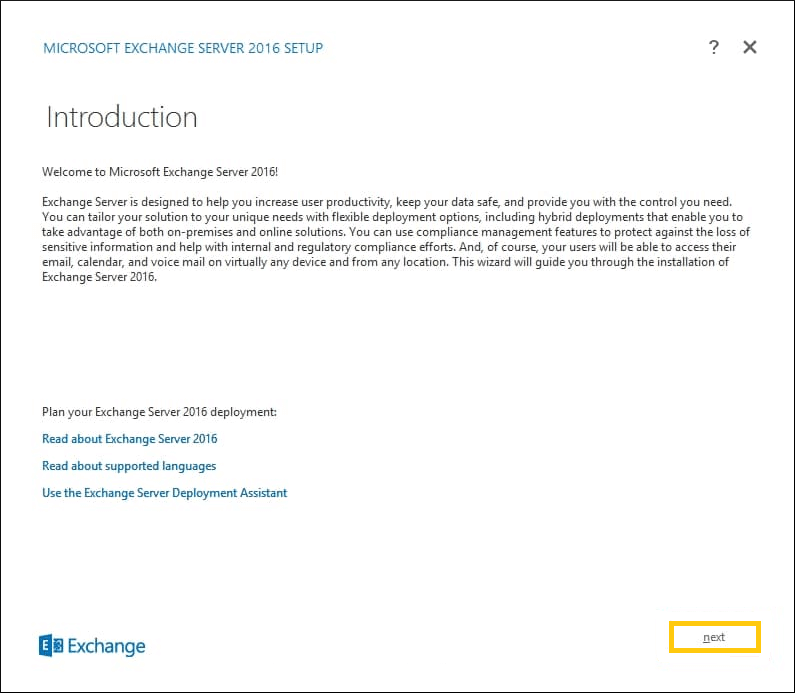
- Read the given Introduction related to the Exchange Server properties and click Next.
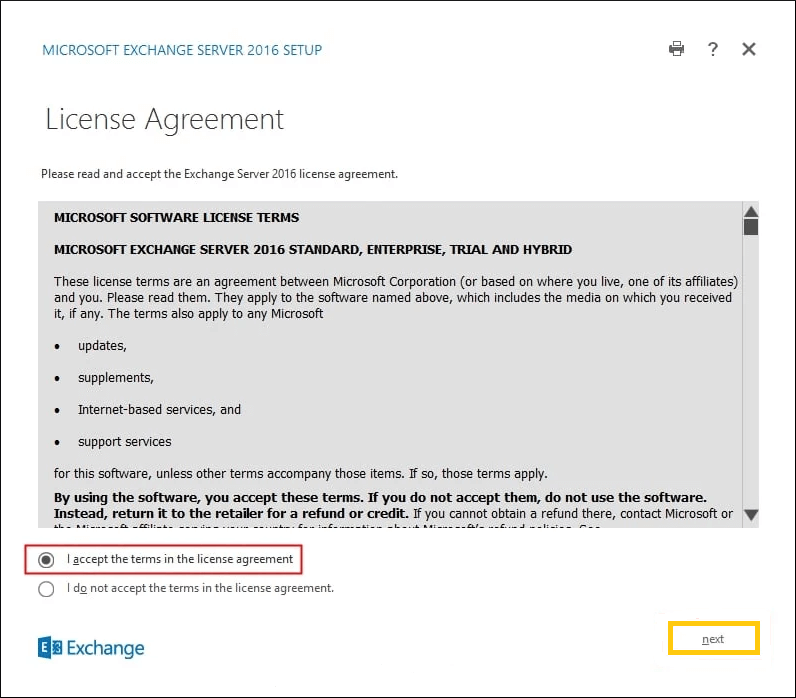
- Accept the License agreement terms and click Next.
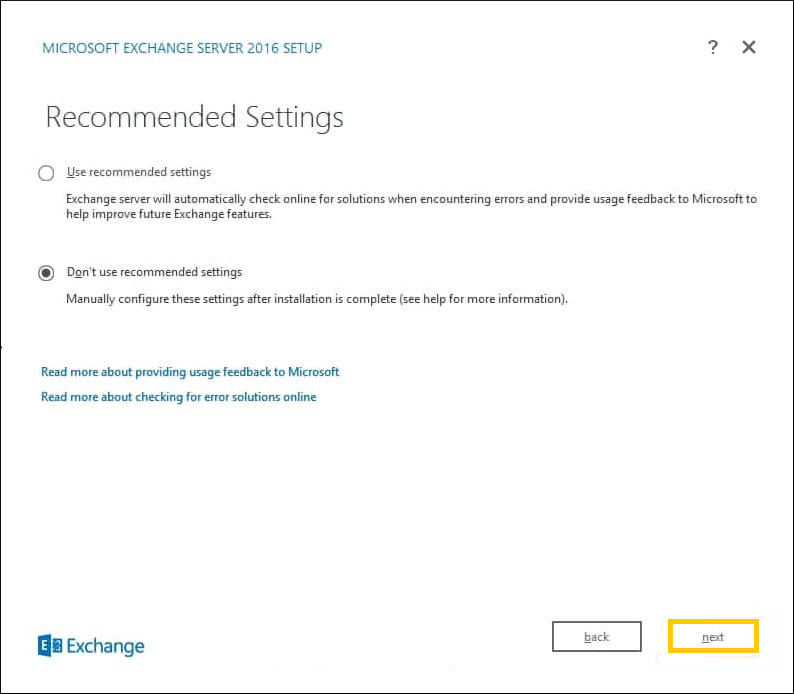
- On the Recommended Settings page, choose whether you want to use the recommended settings and not. If you choose the recommended settings, then Exchange server will automatically check for online solutions whenever an error occurs and provide the necessary feedback to help the Exchange features. In the Manual configuration, you can enable the settings are the completion of installation.
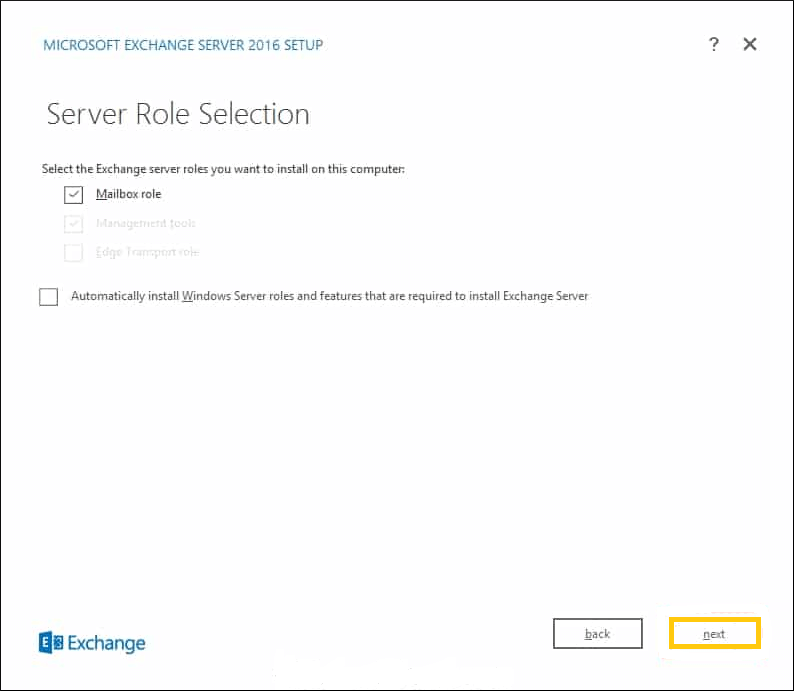
Click Next. - On the Server Role Selection page, choose Mailbox Role. The Management Tools will install automatically after selecting the Mailbox Role. Also, click the checkbox for automatically install Windows Server Roles and features that are required to Install Exchange Server. Then click Next.
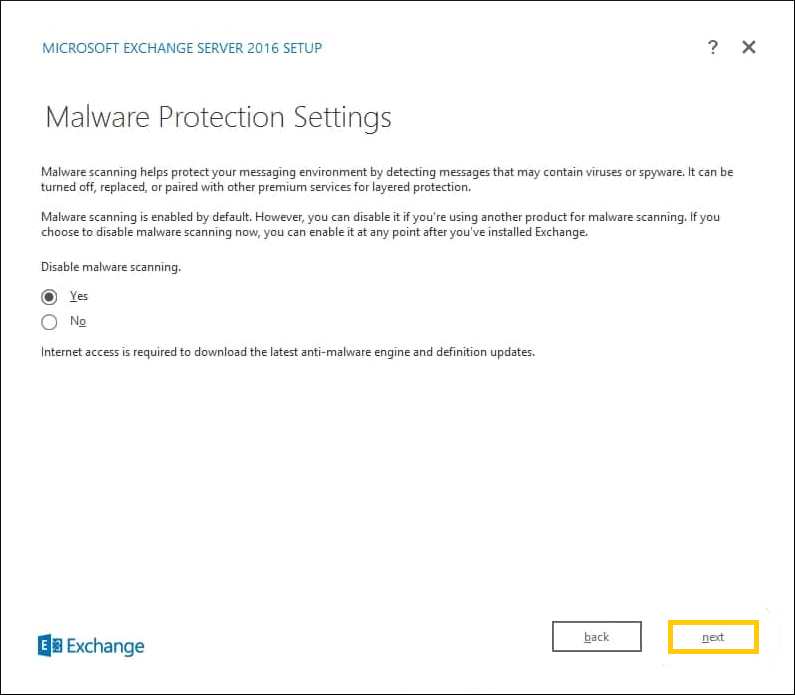
- The Malware Protection Settings is an important page where you can choose to enable the malware scanning. It will help recognizing such messages that can contain viruses or spyware. Click Yes, then click Next.
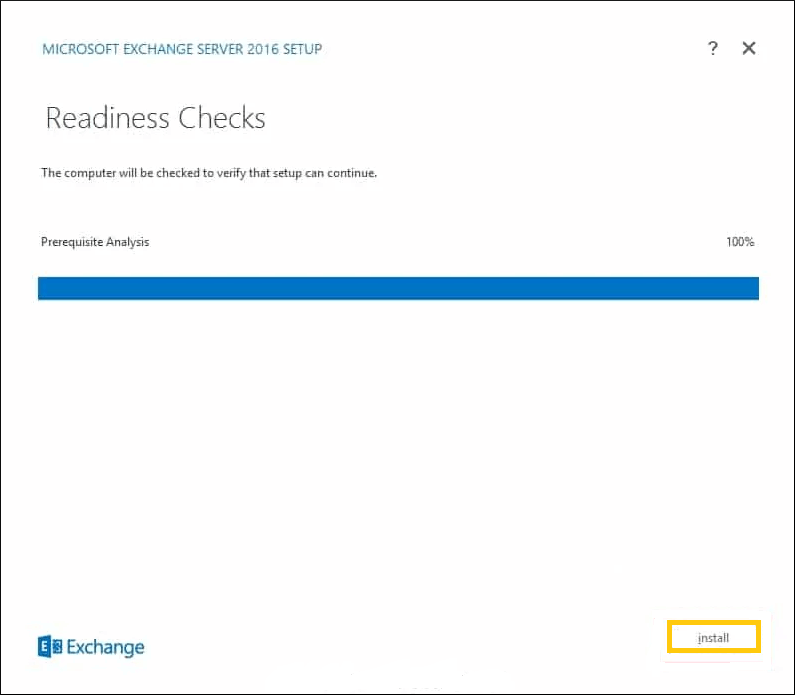
- Setup will check for the setup, its settings and run a through scan. After the completion, click Install.
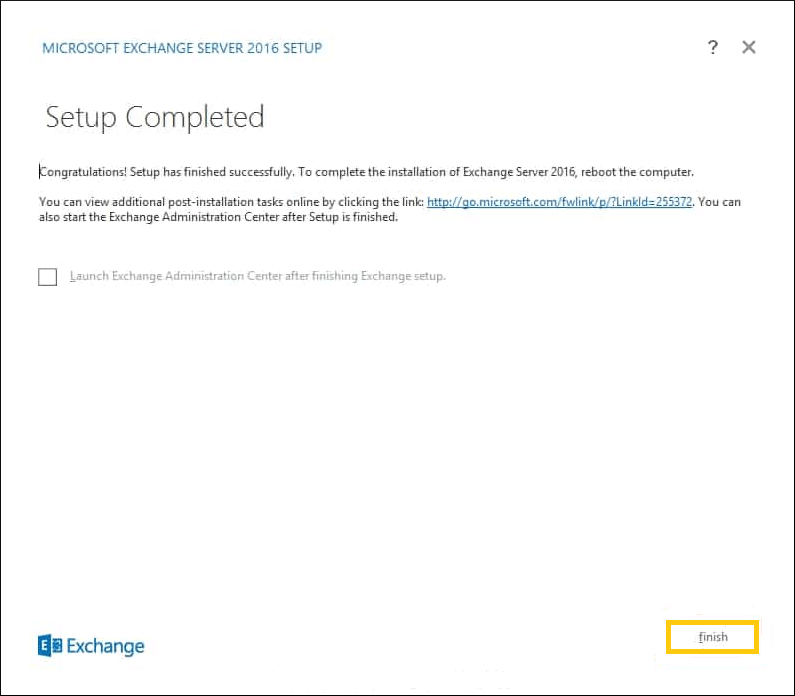
- The setup is completed successfully and you need to restart the computer to finalize the installation. Click Finish.
Now you can go in Exchange Admin Center and create the Administrator and other accounts.
Migrate mailboxes from Exchange Server 2013 to 2016
After the installation of new Exchange Server in the system, there are actually two servers present in a co-existence. So, you can migrate the mailboxes from one database to another easily. Follow the below procedure at the Exchange Admin Center
- Go to Recipients, then Mailbox list. Choose the mailbox that you want to migrate, then click Move Mailbox. You can also go migration category and click Move to a different database, then choose the mailbox and click Next.
- Now, provide the name to the migration batch and choose the database as the destination for the mailbox. You can also choose whether you want to migrate primary mailbox, archive mailbox, or both. Click Next.
- Choose a user account that will receive the migration notification.
- Choose whether you want to start the migration instantly or schedule the migration for a later time. Click New to start the move request.
- The status of the migration request will be syncing.
- After the completion of migration, you can choose to migrate other mailboxes similarly.
Decommission Exchange Server 2013
When you have migrated all the content from Exchange Server 2013, then you can go ahead and uninstall the server completely. Follow the below steps;
- Remove the hybrid connection using the Remove-HybridConfiguration command at the Exchange Management Shell.
- Remove the hybrid connectors manually in the connectors category in mail flow.
- Remove organizational sharing in the sharing category in organization.
- Remove the mailbox database.
- Disable the Arbitration Mailbox.
- Delete the default mailbox database.
- Uninstall the Exchange Server file from the Control Panel.
For more details, Read decommission Exchange Server 2013 Step by Step Guide
Conclusion
We have presented a complete migration guide from Exchange Server 2013 to 2016 in the simple steps. You can follow the whole guide and complete a migration. But if you want to complete the migration quickly and effectively, then you can use a professional Exchange Migration software and get the job done. The professional software can access the mailboxes from the Exchange Server 2013 mailbox and migrate the directly to Exchange Server 2016 mailbox. You can apply the useful filters and get a report of the migration also.

I used other manual methods before using this one, and believe me it is impeccable. With this method I shifted data from Exchange server 2013 to Exchange 2016. And then I decommissioned Exchange 2013 very well.
Firstly I was insecure about successful migration of Exchange server 2013 to 2016. Then I found this blog method and install Exchange server 2016 easily.