VHD and VHDX are virtual disks that can be used to do the same task as a physical hard disk on your system. VHDX is a relatively new and updated version of VHD but in a few cases, the VHD file format is preferred by some users according to their usage. VHD or VHDX files are to be used by the user by mounting them to the system. VHDX file has more storage capacity; protects your data from failure and extreme situations whereas VHD has less capacity. There are two types of virtual hard disks with different functions namely- Fixed size and Dynamically Expanding.
Fixed Size – The size of this type of VHD is pre-decided and not modifiable. Once it is created whether you use it or not it is going to make space for that fixed size. For example- if the VHD is decided to be sized 20GB, it is going to take 20GB worth of space on the data store whether you use it or not.
Dynamically Expanding VHD – This is a flexible type of VHD that is helpful for users. It is expandable and takes only the space that you are using. For example- if it is decided that the VHD is going to be 20GB and you are using only 15GB then it takes only 15GB worth of space on the data store.
Various methods to mount/dismount VHD/VHDX files
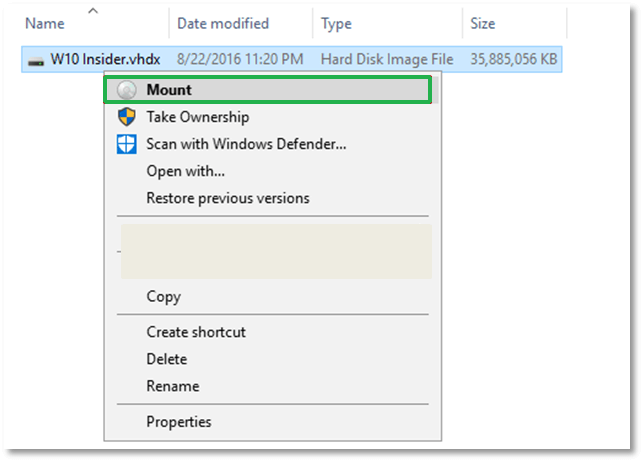
1st Method: By using Windows Explorer
This is the simplest way to mount and unmount the VHD/VHXDX files. This can be performed manually without having to know any technical knowledge. Here are the steps to follow.
- Right-click on the VHD/VHDX file you want to mount and select the Mount option from the menu. This will add a VHD file to the PC as an additional driver which can now be used to copy, move or access data from this VHD file.
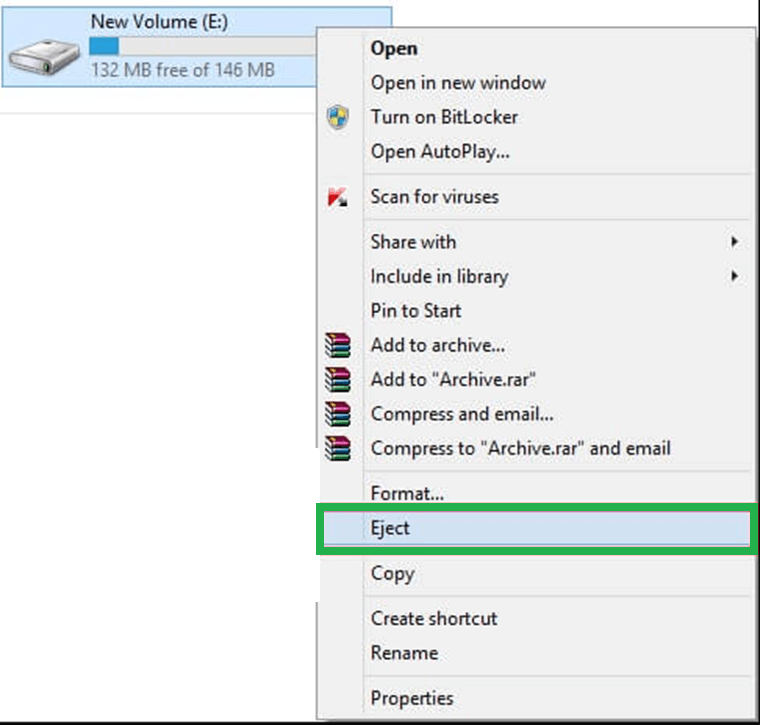
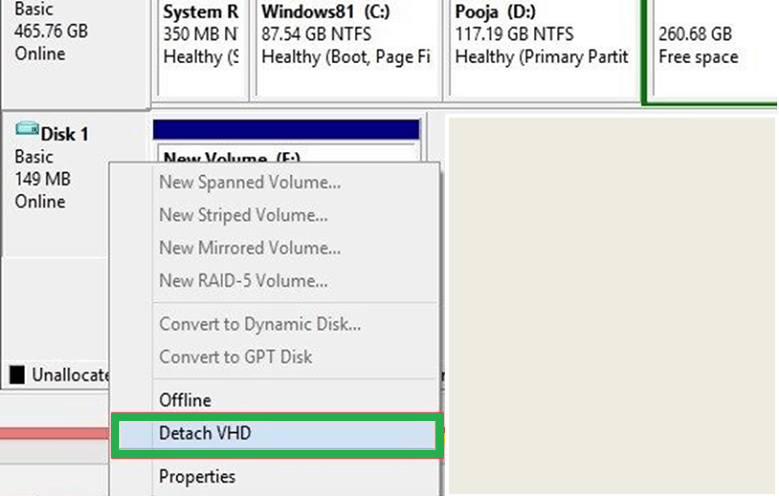
- Go to New volume/drive on the system, right-click on it for options and choose Eject to unmount the VHD/VHDX file.
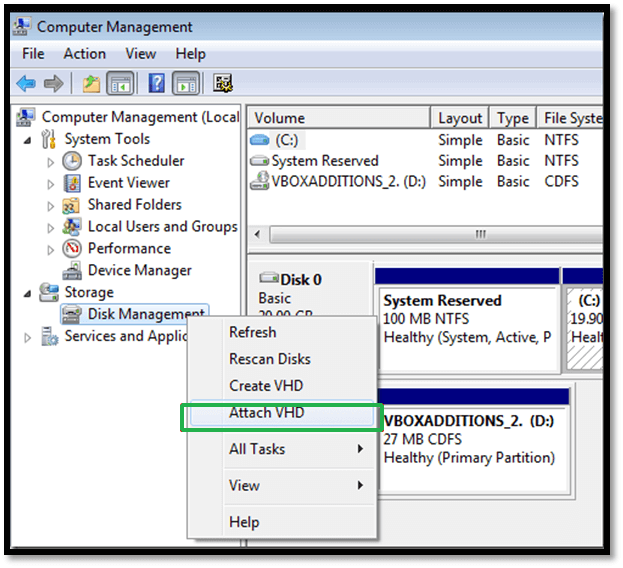
2nd Method: Disk Management option
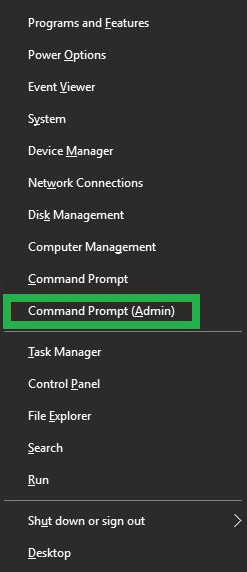
- Right-click on ThisPC > Manage > Disk Management option and select Attach VHD to mount the VHD/VHDX file. Apart from this approach, you can use Win+X keys on your keyboard as a shortcut and then select the Disk Management option then Attach VHD.
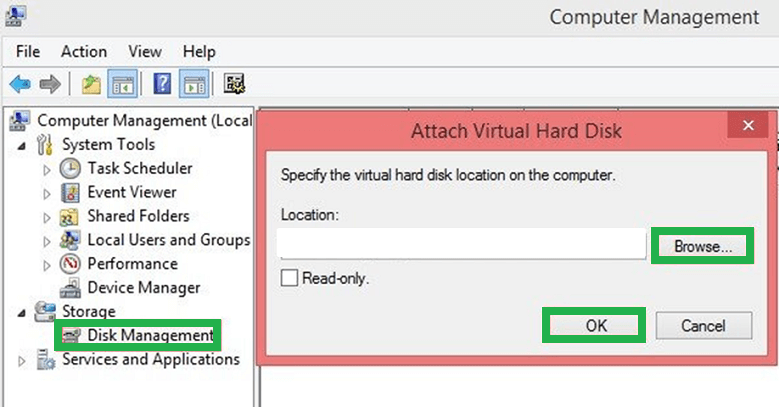
- To load the VHD file, go to the Browse button and navigate the VHD/VHDX file. Then click OK after selecting the file.
- To unmount, simply right-click on the new volume or drive and click Detach VHD.
3rd Method: Use Command Prompt
- Use shortcut Win+X on your system and select Command Prompt (Admin) button.
- Type diskpart in cmd and then press Enter. You can select the VHD/VHDX file location by entering this command- Select vdisk file = “location of VHD file”. Press Enter.
- Type attach vdisk in the cmd and then hit Enter to mount the VHD/VHDX file.
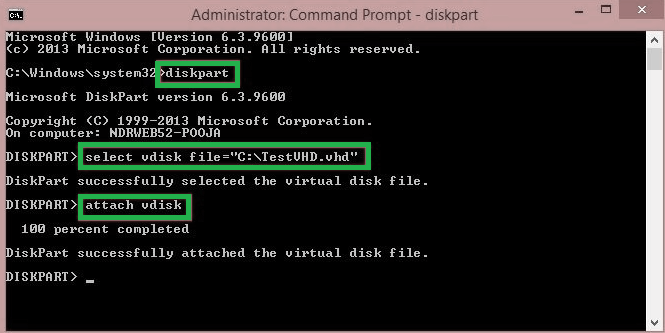
- To unmount VHD/VHDX type detach vdisk before hitting Enter.

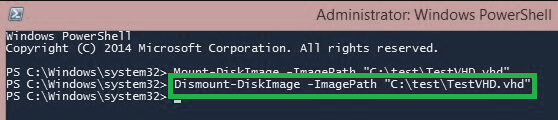
4th Method: Use Windows PowerShell
- Start Windows PowerShell cmdlet as an administrator on your system.

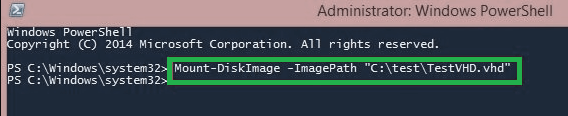
- To mount the VHD/VHDX files type the following command- Mount-DiskImage -ImagePath “location of VHD file”.
- To unmount the virtual disk file type the following command- Dismount-DiskImage -ImagePath “location of VHD file”.
Conclusion
VHD/VHDX files are similar to a physical hard disk that stores data and files on the system. The difference between physical and virtual disks is that you can mount and unmount the VHD/VHDX files. There are some manual methods for the same that are mentioned above which are fairly simple to use. Although there is no third-party tool to mount and unmount the VHD/VHDX we encourage you to use third-party VHD recovery tool for other problems related to VHD/VHDX files such as recovering data from these files.
All various methods to mount and unmount VHD/VHDX files are described step by step in pictorial form to understand by anyone. I appreciate these simple methods. These can be performed manually without having to know any technical knowledge. Thanks for sharing good information.