Summary: Microsoft Outlook can be easily configured with Office 365. This configuration adds to the utility of the software and therefore promotes an easy flow of emails.
However, many a times an internal error can cause a lot of confusion and disruption. The mailbox can be temporarily suspended due a number of reasons. This article will help to solve this issue.
Microsoft Outlook has been one of the most important software that helps to establish the interconnection between the departments in organizations. It helps to establish a unique and error free communication. It has its own cloud network for emailing. Office 365 has got its own utility.
Office 365 configures with your email account and helps to manage the data and the emails properly on Outlook. However, at times, it can create issues as well and disrupt your functioning.
When you are working in Outlook configured with Office 365 account, then you are not secured about the safety and the quality of the data. This is evident from the recent display of message on the system which reads as follows:
The message will further show the workaround for you like this.
- A temporary mailbox exists, but might not have all of your previous data.
- You can connect to the temporary mailbox or work offline with all of your old data.
- If you choose to work with your old data, you cannot send or receive e-mail messages
It is a detailed message that shows that your primary mailbox has been moved on Exchange Server.
Now you cannot continue to work with the temporary mailbox as it will not allow you to send or receive emails message, so there is a need to look forward to perform some troubleshooting to find the issue and remove it.
Note: It is not recommended to connect to temporary mailbox as it might result in data loss at some point of time.
Microsoft has given some workaround methods that you can follow to reattach your primary mailbox with the Outlook again.
- Delete all accounts from Outlook except the primary one.
- Delete the original account profile and create a new one.
- Enable the Cached Exchange Mode in Outlook.
- Modify Windows Registry Key (EnableADAL)
Now follow all these methods one by one. Start with the first one and if it does not work, then follow the next ones.
- Delete all accounts from Outlook except the primary one:
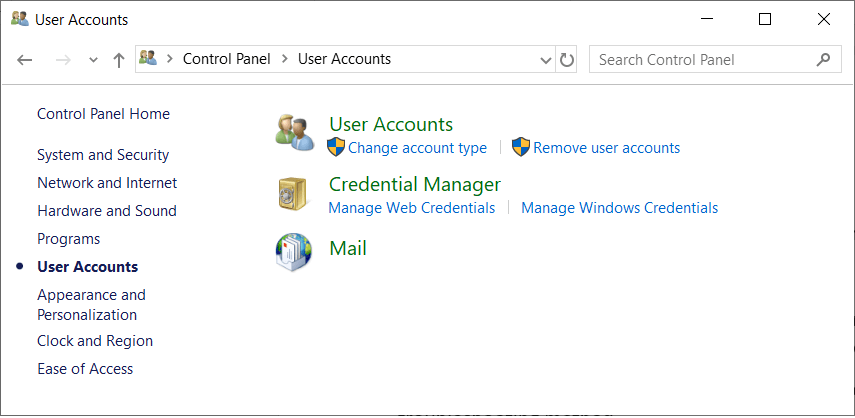
- Close the application of Outlook and go to Control Panel.
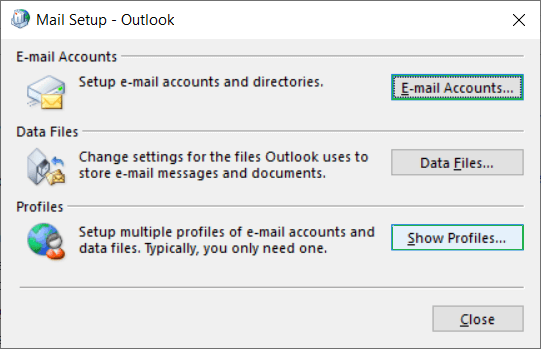
- Search the Mail icon and double-click it.

- Click Show Profiles button.
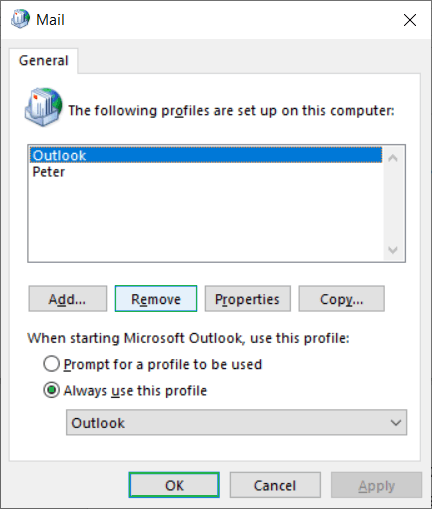
- After opening the Mail dialog box, select the non-primary account and click Remove.
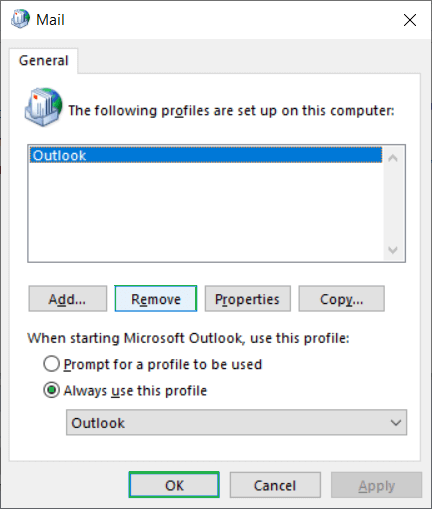
A caution message will show you that removing the account will also remove the offline cached content. Click Yes and go ahead. - Follow the same 4 steps to remove all the accounts except the primary account.
- At last, escape the Control Panel and restart Outlook application.
If the Outlook still shows the error message, then you need to follow the second troubleshooting method.
- Delete the original account profile and create a new one:
- Start Control Panel and search Mail.
- After opening the Mail dialog box, you need to first create new Outlook profile and delete the old one.
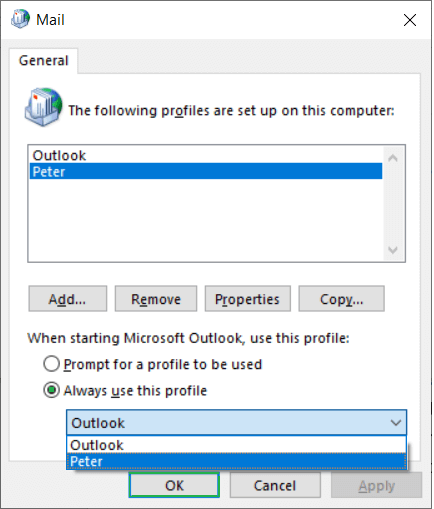
- Click Show Profiles, and then click the Add button.
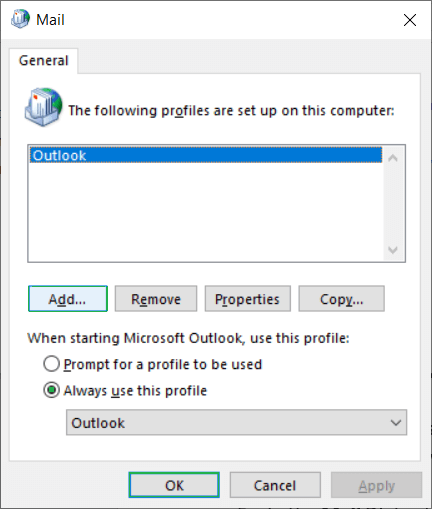
- Follow the step-by-step procedure to create a new account in the Add Account Wizard.
- In the Mail Dialog box, use the drop-down icon and select the new account and choose the option to Always use this profile.
- After you have created the account successfully, you need to go to the Show Profiles tab and select the older account. Click the Remove button.
- Again the caution message will show that when you remove the account, then the offline cached content will also go with it. Click OK.
- Cancel Control Panel and restart Outlook.
- Start Control Panel and search Mail.
- Enable the Cached Exchange Mode:
- Again you need to go to Control Panel and open Mail option.
- Click the Email Accounts option.
- Select the account and click the Change icon.
- In the Server Settings page, go to the Offline Settings category and click the checkbox ‘Use Cached Exchange Mode’
- Now the Cached Exchange Mode has been enabled for your account.
- Restart Outlook and check if it is opening normally.
- Modify Windows Registry Key (EnableEADL):
- Close the Microsoft Outlook application.
- Press Windows & R keys together, type regedit and click OK to open the Windows Registry Editor.
- Go to the location: HKCU\SOFTWARE\Microsoft\Office\15.0\Common\Identity\
- Next, double click on EnableEADL key to modify it. Enter the new value as 1 and change Base setting to Hexadecimal.
- Similarly double click on Version key and modify the same settings – value to 1 and Hexadecimal from Base setting.
- Close or exit the Registry Editor.
- Restart the system and then run the Outlook application.
- Additional Methods: The above methods are given by the Microsoft support team and should remove the issue once the user complies with these following steps. But, if these methods do not work for you, then you can move for some additional methods that may be able to help you in recovering from the error.
- Using scanpst.exe: Microsoft Outlook provides an in-built inbox repair tool that used in scanning and repairing corrupted or damaged PST file.
This tool will help you to check if there is any error in the mailbox or if there is an error showing mailbox is temporarily moved on the Microsoft Exchange Server,. Check PST file default location to take a backup of PST file before using the ScanPST.exe because the tool can delete some data from the mailbox and then restore the remaining data using the backup file only. Though it will allow you to access the account, but the deleted data at the time or after using scanpst.exe will not come back.
- Disable the faulty add-ons: Most of us use various types of add-ons in the Outlook and they prove themselves useful in various activities like a grammar checker, format converter, pdf reader, language converter and many more. But some of the third-party applications may affect your account’s security and it may deactivate the account or disconnect it from the Outlook. You should check the add-ons that you are using and remove them.
First run the Microsoft Outlook application in safe mode by typing outlook /safe in the Windows run box. Then go to File > Options. Click on Add-ins option from the left panel and click Go against Manage COM Add-ins. Next, select the desired Add-ins and click Remove option to remove it from the Outlook application.
- Disable the anti-virus application: Anti-virus applications save computer applications from the external attacks of malware and spyware. Sometimes, these anti-virus applications find some malware in the data file of your account and they may stop the Outlook from accessing it. You can disable the anti-virus application for a limited time and try to access the account on the Outlook.
- Use ScanPST: ScanPST is definitely an inbuilt repair tool that helps to scan the files and also repair the minor errors due to which the network does not work. You can backup the file and then scan the data for removing errors.
Finally
Losing your Outlook account is painful for such users who have stored the important emails, contacts related to your business. If any of the methods do not work to reset the account with Outlook, then you should use any Outlook PST Repair software to retrieve all the information from the Outlook data files (OST and PST). With the help of these methods, you can be position to gain back access of your data.

I was facing this error before, then I enabled cached Exchange mode and the issue was fixed. All the above tips are worthy and works in different different scenarios. Thanks for this great blog post.
Highly written and informative blog. ALL methods are very useful when your mailbox temporarily moved to the MS Exchange server. You can resolve this problem by using suggested methods. The author also suggested a third party utility according to the user’s needs.