All the Exchange Server admirers and interested ones know about the latest Exchange Server version, i.e. Exchange 2019. Its advanced features and security measures are alluring Exchange users to seek the migration. This blog is focused on the manual process to install Exchange Server 2019. But before that let us know about some main points or features in Exchange 2019 which are encouraging the older version Exchange users to install this latest version.
- Exclusive compatibility to Windows Server Core
- Supports 256GB RAM & 48 CPU cores
- Security enhancements
- Improved calendar management
- Improved search mechanism
- Outstanding look and features in Outlook Web Access
- New Client Access Rules for Exchange administration through internal network
There are more facilities provided with the latest Exchange Server 2019 for the users. Now, let us focus on the installation process of the Exchange Server 2019.
Manual Installation Procedure of Exchange Server 2019
Exchange users or administrators need to fulfill some requirements before starting the procedure of Exchange Server 2019 installation. We are providing you the main pre-requisites here.
Pre-Requisites
Hardware Requirements
| Processor | Intel 64-bit processor (EM64T), AMD 64-bit processor) |
| Minimum Disk Space | 30GB Free |
| Minimum Memory | 128GB (for Mailbox), 64GB (for Edge Transport) |
| File System | NTFS |
| Screen Resolution | 1024*768 |
Software Requirements
Operating System Requirements
| Mailbox and Exchange Transport | Windows Server 2019 Standard/Data Center |
| Management Tools | Windows 10 (64-bit) or Windows Server 2019 Standard/Data Center |
Outlook Clients Requirements
Outlook 2013/Outlook 2016/Outlook 2016 for Mac/Outlook 2019/Outlook for Mac for Office 365
Network & Directory Server Requirements
| Active Directory Forests | Windows Server 2012 R2 or later versions |
| Active Directory Site | With Writeable Domain Controller, Undeletable |
| Domain Controller | Windows Server 2019 Standard/ Windows Server 2016 Standard/Windows Server 2012 R2 Standard |
| DNS Namespace | Contiguous/ Non-Contiguous/Disjoint/ Single label domains |
| IPv6 Support: | Both IPv4 and IPv4 required |
When all the above pre-requirements are fulfilled, Exchange administrators can follow on to prepare an Active Directory.
For smaller organizations, it is enough that the account is a member of Schema Admin as well as Enterprise Admin security groups to move on to the Exchange set up stage.
But for larger organizations with multiple mailboxes, there is a need to prepare an Active Directory environment before going to the Exchange set up process. Let us know this process in points.
Active Directory Environment Preparation for Exchange 2019
- First install .NET framework (4.7.2 or 4.7.1), Visual C++ Redistributable Packages for Visual Studio and Unified Communications Managed API on your Exchange system.
- Once all the above software requirements are installed, restart your system.
- Launch Windows PowerShell (as an administrator). Here run a command as below.
Install-WindowsFeature RSAT-ADDS - Next step is to run another command in the Windows PowerShell to install Server requirements.
Install-WindowsFeature NET-Framework-45-Features, RPC-over-HTTP-proxy, RSAT-Clustering, RSAT-Clustering-CmdInterface, RSAT-Clustering-Mgmt, RSAT-Clustering-PowerShell, Web-Mgmt-Console, WAS-Process-Model, Web-Asp-Net45, Web-Basic-Auth, Web-Client-Auth, Web-Digest-Auth, Web-Dir-Browsing, Web-Dyn-Compression, Web-Http-Errors, Web-Http-Logging, Web-Http-Redirect, Web-Http-Tracing, Web-ISAPI-Ext, Web-ISAPI-Filter, Web-Lgcy-Mgmt-Console, Web-Metabase, Web-Mgmt-Console, Web-Mgmt-Service, Web-Net-Ext45, Web-Request-Monitor, Web-Server, Web-Stat-Compression, Web-Static-Content, Web-Windows-Auth, Web-WMI, Windows-Identity-Foundation, RSAT-ADDS - Now, mount Exchange Server 2019 Preview Installation Media on the system.
- Type cmd in the Search box, right-click Command Prompt and select Run as administrator option. On the opened Command Prompt window, run this command for schema preparation.
Setup.exe /PrepareSchema /IAcceptExchangeServerLicenseTerms - Next, run this final command for domain preparation.
Setup.exe /PrepareAllDomains /IAcceptExchangeServerLicenseTerms - Hence, you have successfully prepared an Active Directory environment (Schema and Domain) to install Exchange Server 2019.
Now, you need to move on to the Exchange Server set up installation with the set up application on your Exchange system.
Exchange Server 2019 Installation and Set-up Procedure
Perform the following steps to complete the Exchange 2019 set-up installation.
- Go to the Setup.exe, double click on it to start the installation procedure.
- On the next Check for updates? window, select from the options – Connect to the Internet and check for updates and Don’t check for updates right now as per your requirement and click on next.

- Next, the copying process of Exchange files required to install the Exchange Server will get started. Watch the process.
- The screen with Initializing Setup will be displayed next.
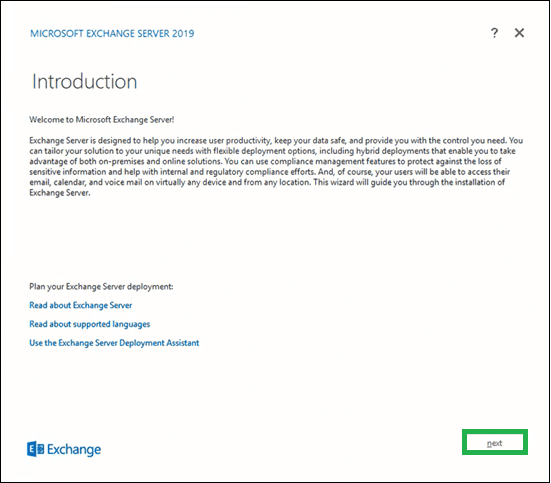
- Now, you come across the Introduction page for the Exchange Server 2019. Read the brief introduction about the server. You can click on the provided links to get more information. Click next to continue.
- On the License Agreement page, read all the instructions, select the option saying I accept the terms in the license agreement and click next.

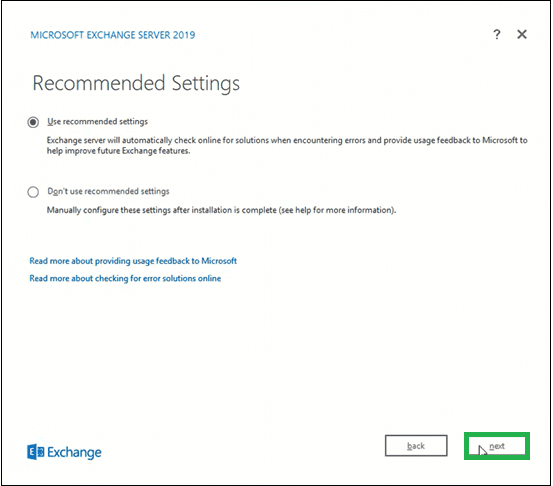
- On the Recommendation Settings page, select Use recommendation settings option and click next.
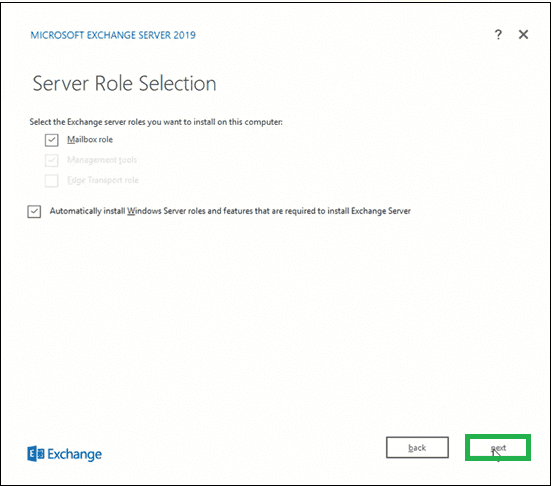
- Here, select Mailbox role option under Exchange Server roles section and select the checkbox Automatically install Windows Server roles and features that are required to install Exchange Server. Click next.
- Click browse to specify the path for Exchange Server installation or leave it to the default selected path. Click next.

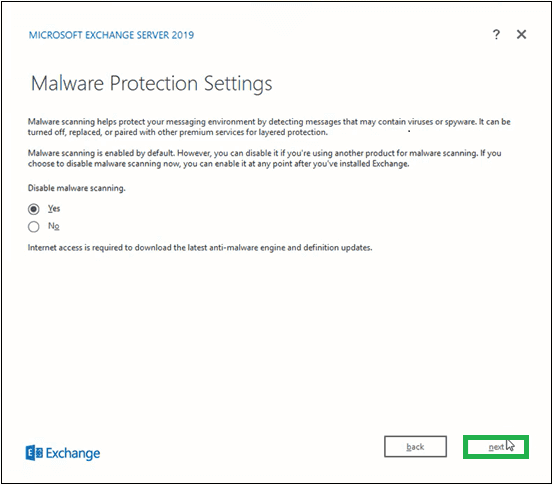
- For Malware Protection Settings, select Yes or No option (to disable malware scanning) and click next.
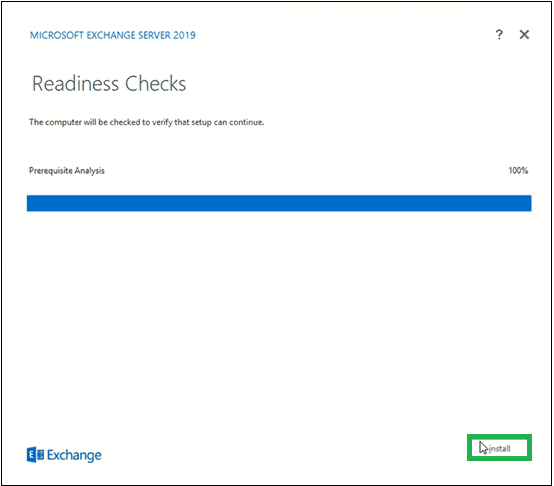
- Wait for the completion of Readiness Checks to verify the setup and then click install.
- The Setup Progress will start copying the Exchange files.
- Once the setup is completed, it will display a page Setup Completed.
To launch the Exchange Server instantly, select the checkbox Launch Exchange Administration Center after Finishing Exchange setup. Click finish.
Hence, the Exchange Server 2019 is successfully installed on your system. By running these two commands in the Exchange Management Shell, you will get the complete information about your newly installed Exchange Server.
And
Get-ExchangeServer -Identity MailboxName | Format-List
Exchange 2019 administrators can also login to the Exchange Admin Center to confirm for the successful Exchange Server installation.
Note: An Exchange administrator should follow the post installation tasks for the Exchange Server such as providing Exchange product key, Exchange management tools installation on client machine, Edge subscriptions, security certifications configuration and more.
Certificate Requirements for Exchange services
We need to install the certificate for the services like IIS, SMTP, and so on. Login to Exchange Admin Center and go to Service Certificate to create certificate signing request (CSR) file to generate a certificate from third party Certification Authority.
Configure Exchange Server 2019 Certificate
It is the most important post installation task to configure SSL certificate in Exchange 2019. For delivering a secure messaging infrastructure, ensure that certificates are installed and configured properly. Certificate management in the EAC can help administrators:
- Minimizing the number of certificates that are required.
- Minimizing the interaction that’s required for certificates.
- Allowing the centralized installation and management of certificates on all Exchange servers in organization.
There are 2 methods available in Exchange 2019 to configure SSL Certificate.
- SSL Certificate using Exchange Admin Center
- SSL Certificate using Exchange Management Shell
This was the whole process of installing Exchange Server 2019 on your system.
If you are interested in performing mailboxes migration from your older version of Exchanger Server to to Exchange Server 2019 or other version easily, you can simply trust on our Exchange Migration tool. It provides the easiest migration without any data hampering or integrity loss. It supports all Exchange Server versions for migration and includes intelligent filters for selective migration. Know better about this tool by working on its free trial version (can be accessed from its website) yourself.