Outlook users know the use of Send/Receive feature which triggers the action of sending or receiving emails. It is the frequently used feature in the Outlook application. Whenever a user clicks on this option, the emails will get processed to be received or/and sent quickly.
The reason behind the development of this Send/Receive option in Outlook is basically to move any stuck emails in Outlook Outbox folder of the PST mailbox due to internet issues or any other sort of interference to the intended users’ mailbox address.
If everything is OK, users will experience exchange of emails otherwise an error is displayed saying (either of the two shown):
- 0x8004010F: Outlook data file cannot be accessed.
- 0x8004010F: The operation failed. An object could not be found.
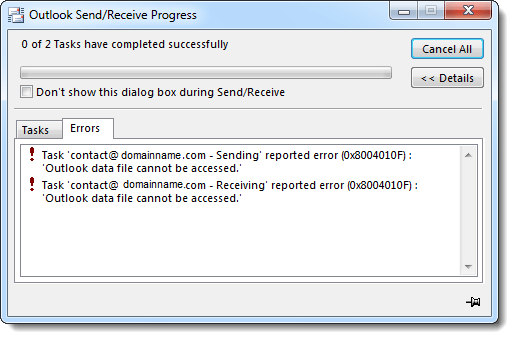
Any of the above two errors’ occurrence shows that the operation got failed and emails are not exchanged or synchronized. This kind of error is also known as “Outlook Send Receive Error 0x8004010f”. The common reasons responsible for this Send/Receive error is damage or corruption in Outlook profile, incorrect configuration of Outlook profile, wrong permissions to Outlook file, Firewall or Antivirus programs interventions, or movement of Outlook folder files within system drive locations.

Recommended: Manual Methods to Repair Corrupt PST File
For your knowledge, it is feasible to create a new Outlook profile anytime in the Outlook application given that it uses single account and not multiple accounts. If your Outlook application has single account, you can easily perform the method in the further discussed solutions to fix Outlook error 0x8004010f.
Common Manual Fixes
We are representing the feasible manual ways to fix the Outlook Send Receive error. Please follow the mentioned procedure steps and give a trial on your own.
Try Disabling Antivirus Programs
Sometimes, externally installed Antivirus utilities interfere in the functioning of other programs or applications like Microsoft Outlook and become the cause for Outlook error 0x8004010f. Users can try disabling that antivirus programs and check for if it resolves your problem. To disable the antivirus program, follow these steps.
- Right-click on the taskbar and select the Start Task Manager option.
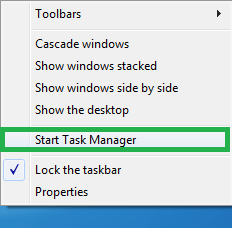
- Under the programs in Task Manager, choose the Antivirus program software and click the Disable option
- Next, restart your system and check if you can send the emails via your Outlook application
Note: It is also advised to Turn off the Windows Defender Firewall facility from the Control Panel on your system.
Creating a New Outlook Profile
Firstly, you should know your exact Outlook PST file location as it would be required while setting up new profile account manually. For that visit Control Panel interface. Here, click on Mail option. Then click on Show Profiles tab. Select the current Outlook profile and click on Properties option. Then choose Data Files tab. In the opened Account Settings page, you will see the default PST file of your profile. Then, copy down the shown PST file path location to a notepad or similar location.
Now, create an Outlook profile with these sequential steps.
Note: Try creating the new local mailbox in Outlook again by navigating to Account Settings in the application, selecting the account with issue and clicking the Change folder option. Then selecting New Outlook Data File option and clicking OK. Once this process is completed, the user can try sending/receiving emails again using the Send/Receive option.
Auto Account Setup – for creating IMAP account
- Open Control Panel on your system. Click on Mail option.
- Click on Show Profiles option in this dialogue box.
- Add a new profile in Outlook by clicking on the given Add option.
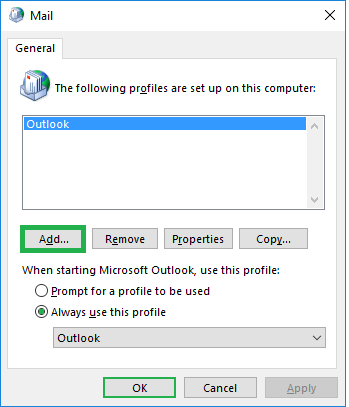
- Provide a name to this new Outlook profile and click on OK.
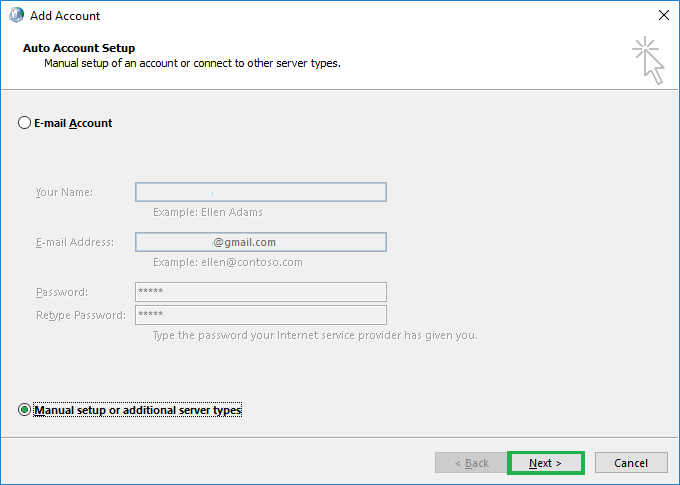
- The Add Account dialogue box is displayed. Here, under Auto Account Setup section, enter the new email account name, address, password, etc. and click on Next option.
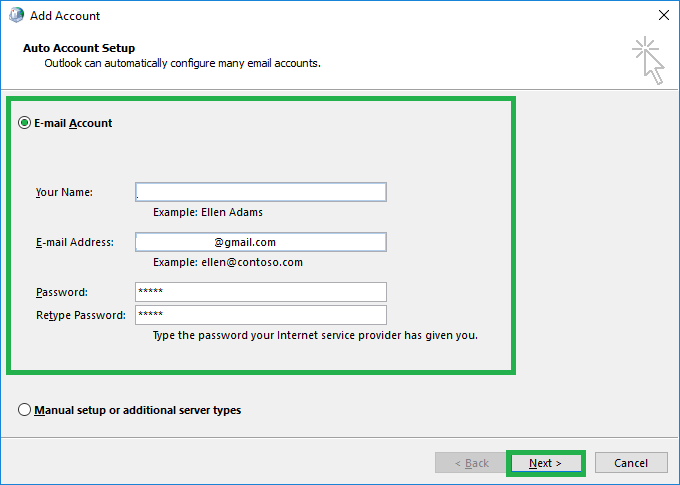
- It will start establishing the connection. It will show a message once the account is well connected. After that, click on Finish option.
Manually Configuring Server Settings – for creating IMAP or POP3 account
- Repeat the above Auto Account Setup method steps from 1 to 4. After that, in the Add New Account dialogue box, choose the second option saying Manually configure server settings or additional server types and click on Next option.
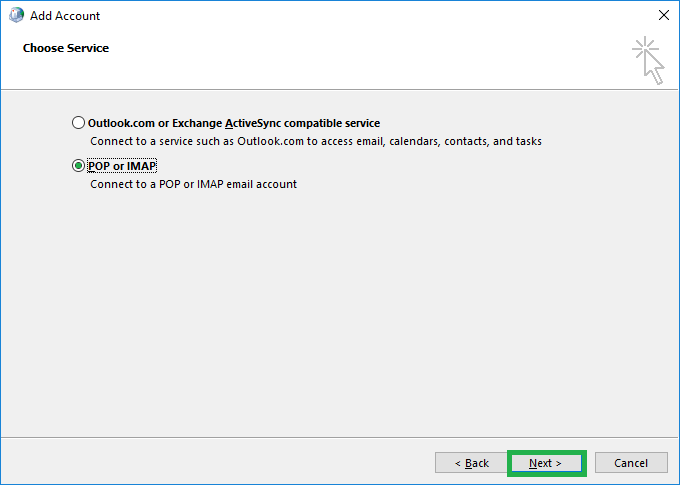
- Select POP or IMAP option under Choose Service section and click on Next.
- In this page, provide the account details like user information, server information and logon information.
- Use Test Account Settings feature to test the account authenticity. Under Deliver new messages section, choose Existing Outlook Data File and browse/add the PST file location which you have noted earlier while locating the PST file path.

- Close the Test Account Settings page and click on Close option. Finally click the Finish option.
Users can set this newly created Outlook profile from either of the above-explained two methods by following Control Panel>>Mail>>Show Profiles>>Mail. Here, select the new Outlook profile name, choose the option Always use this profile and click on OK.
Hence a new Outlook profile is created and set as default. Try using the Send/Receive feature to access emails. If error does not come and messages are delivered or received, then the issue is fixed ultimately.
Check Permissions on the Outlook Data File
Outlook error 0x8004010f may occur if the Outlook Data File is assigned with Read-only permission only and not with full permissions. Have a check on this with following steps.
- Go to the Outlook folder location on your system
C:\Users\Usename Appdata\Local\Microsoft\Outlook
or search .pst file in the C drive search bar.
- Right-click on the Outlook Data File and click on the Properties option.
- Switch to the Security tab on the Properties page.
- Go to the Permissions for Administrators section and make sure all permissions are allowed. If not, click on the Edit option to modify and allow all the permissions to the administrator and click OK.
At the end, one more manual fix is to repair the Microsoft Office program through the Control Panel or reinstalling it to check if the issue is within the program itself,
Fix Outlook Error 0x8004010f with Automated Solution
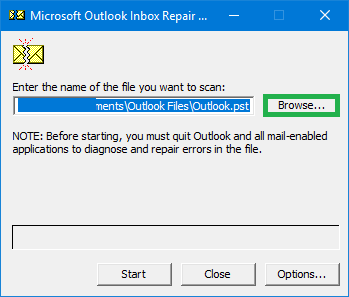
If creating a new Outlook profile and setting it as the default one also has not resolved your problem, then the issue is within the PST file. The error is displayed as the PST file is damaged or corrupted. Though we have manual solution also to fix PST corruptions via in-built Inbox Repair tool (scanPST.exe) which can repair corrupt PST files upto 2GB only and fix minor corruptions only. The default location of the scanPST.exe tool is C:\Program Files (x86)\Microsoft Office\root\Office(x).
You just need to browse the PST file, add it and repair it further.
Though this tool repairs PST file but it throws limitations burdens upon the users like failure to fix large-sized file, complex corruptions and non-confirmation of data security throughout the process.
Best Fix for Corrupt PST
In that demand, we have got you a remarkable solution and the popular one in the market. Fixing variety of Outlook related errors due to PST file corruption is a quite easy task for this ultimate, secure and efficient repair PST tool. The best knowledge about it is all features are available on the official website. Reach the website and perform a free trial for awareness of this advanced tool. Thanks for the time, readers. Keep following more such Outlook help blogs.

Error 0x8004010f in Outlook When sending or receiving emails, this is a common mistake. The instructions provided in this blog, which I carefully read and followed. I was able to resolve this problem using these methods. Thank you for sharing this useful blog.